Node Constraints is basically a parent, more or less. It makes one object follow another, without changing anything in Studio’s actual workspace hierarchy. In this example we’ll constrain a sword to a character’s hand, so it follows the arm wherever it moves.
Spawn in the item or character you want to use as the parent, and the one you want as the child. We’re using the character Hero as the parent and Sword 1 as the child.
Setting the parent and child
Select your parent (Hero, in this case) and press Ctrl+I to open the window.
Since we’re parenting the sword to the arm, click the IK button and find Arm in the node list. When you select a node, a cyan circle highlights it on the body so you can confirm where it actually is.
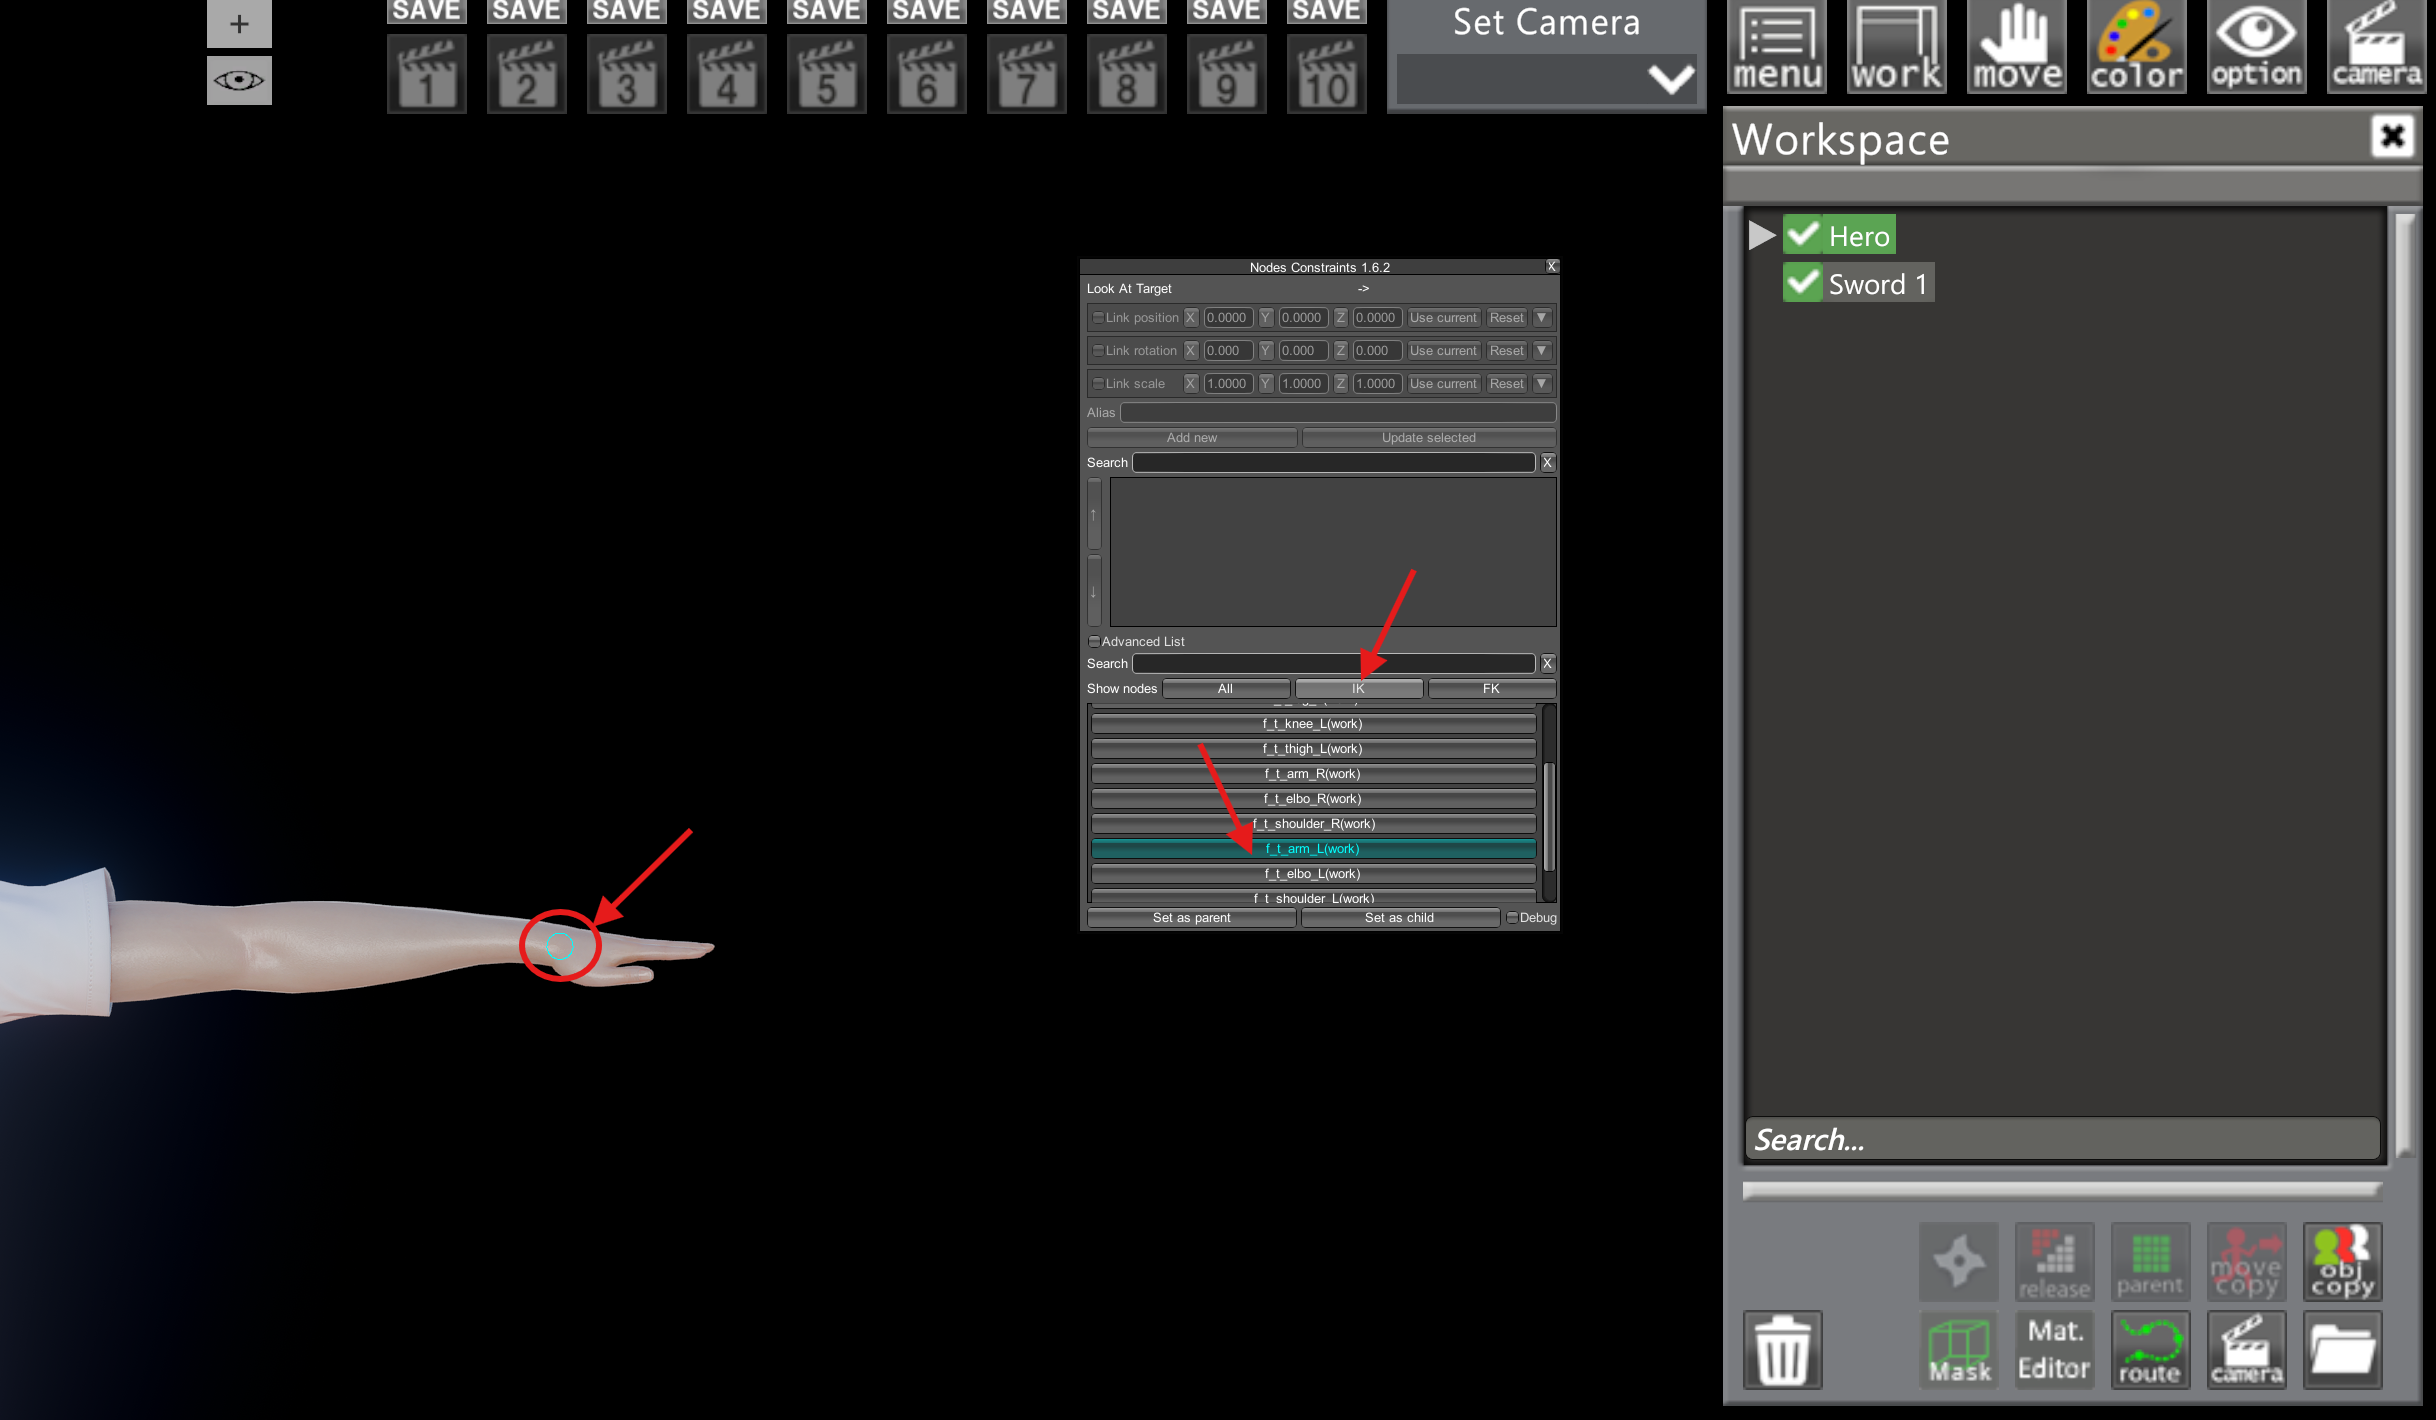
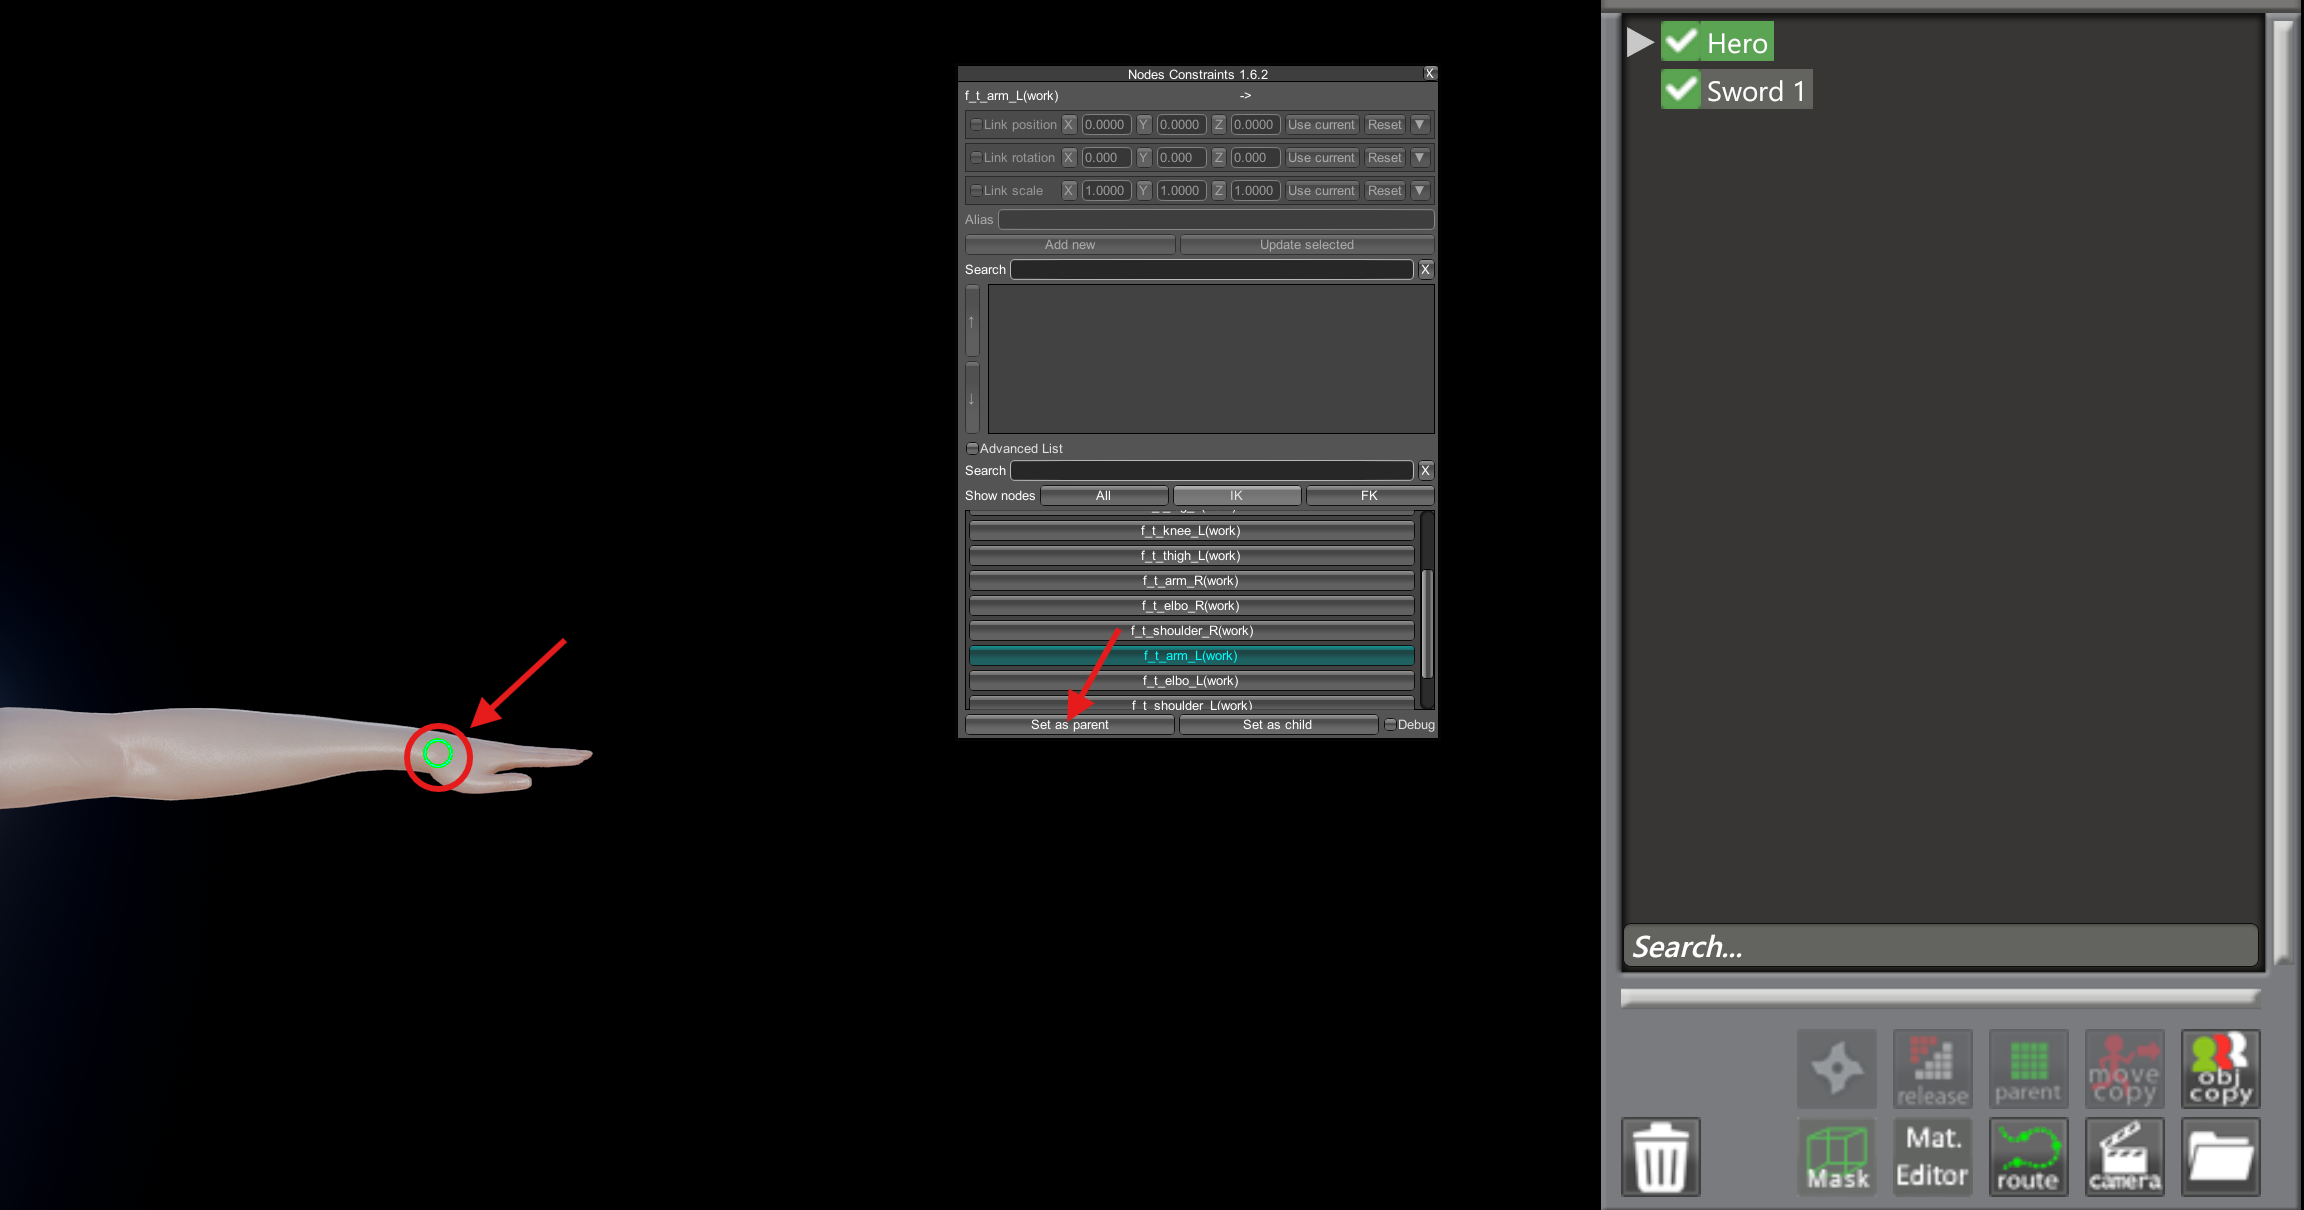
Once you’ve confirmed the circle is on the spot you want to parent to, press Set as parent. The circle turns green to confirm it’s locked in.
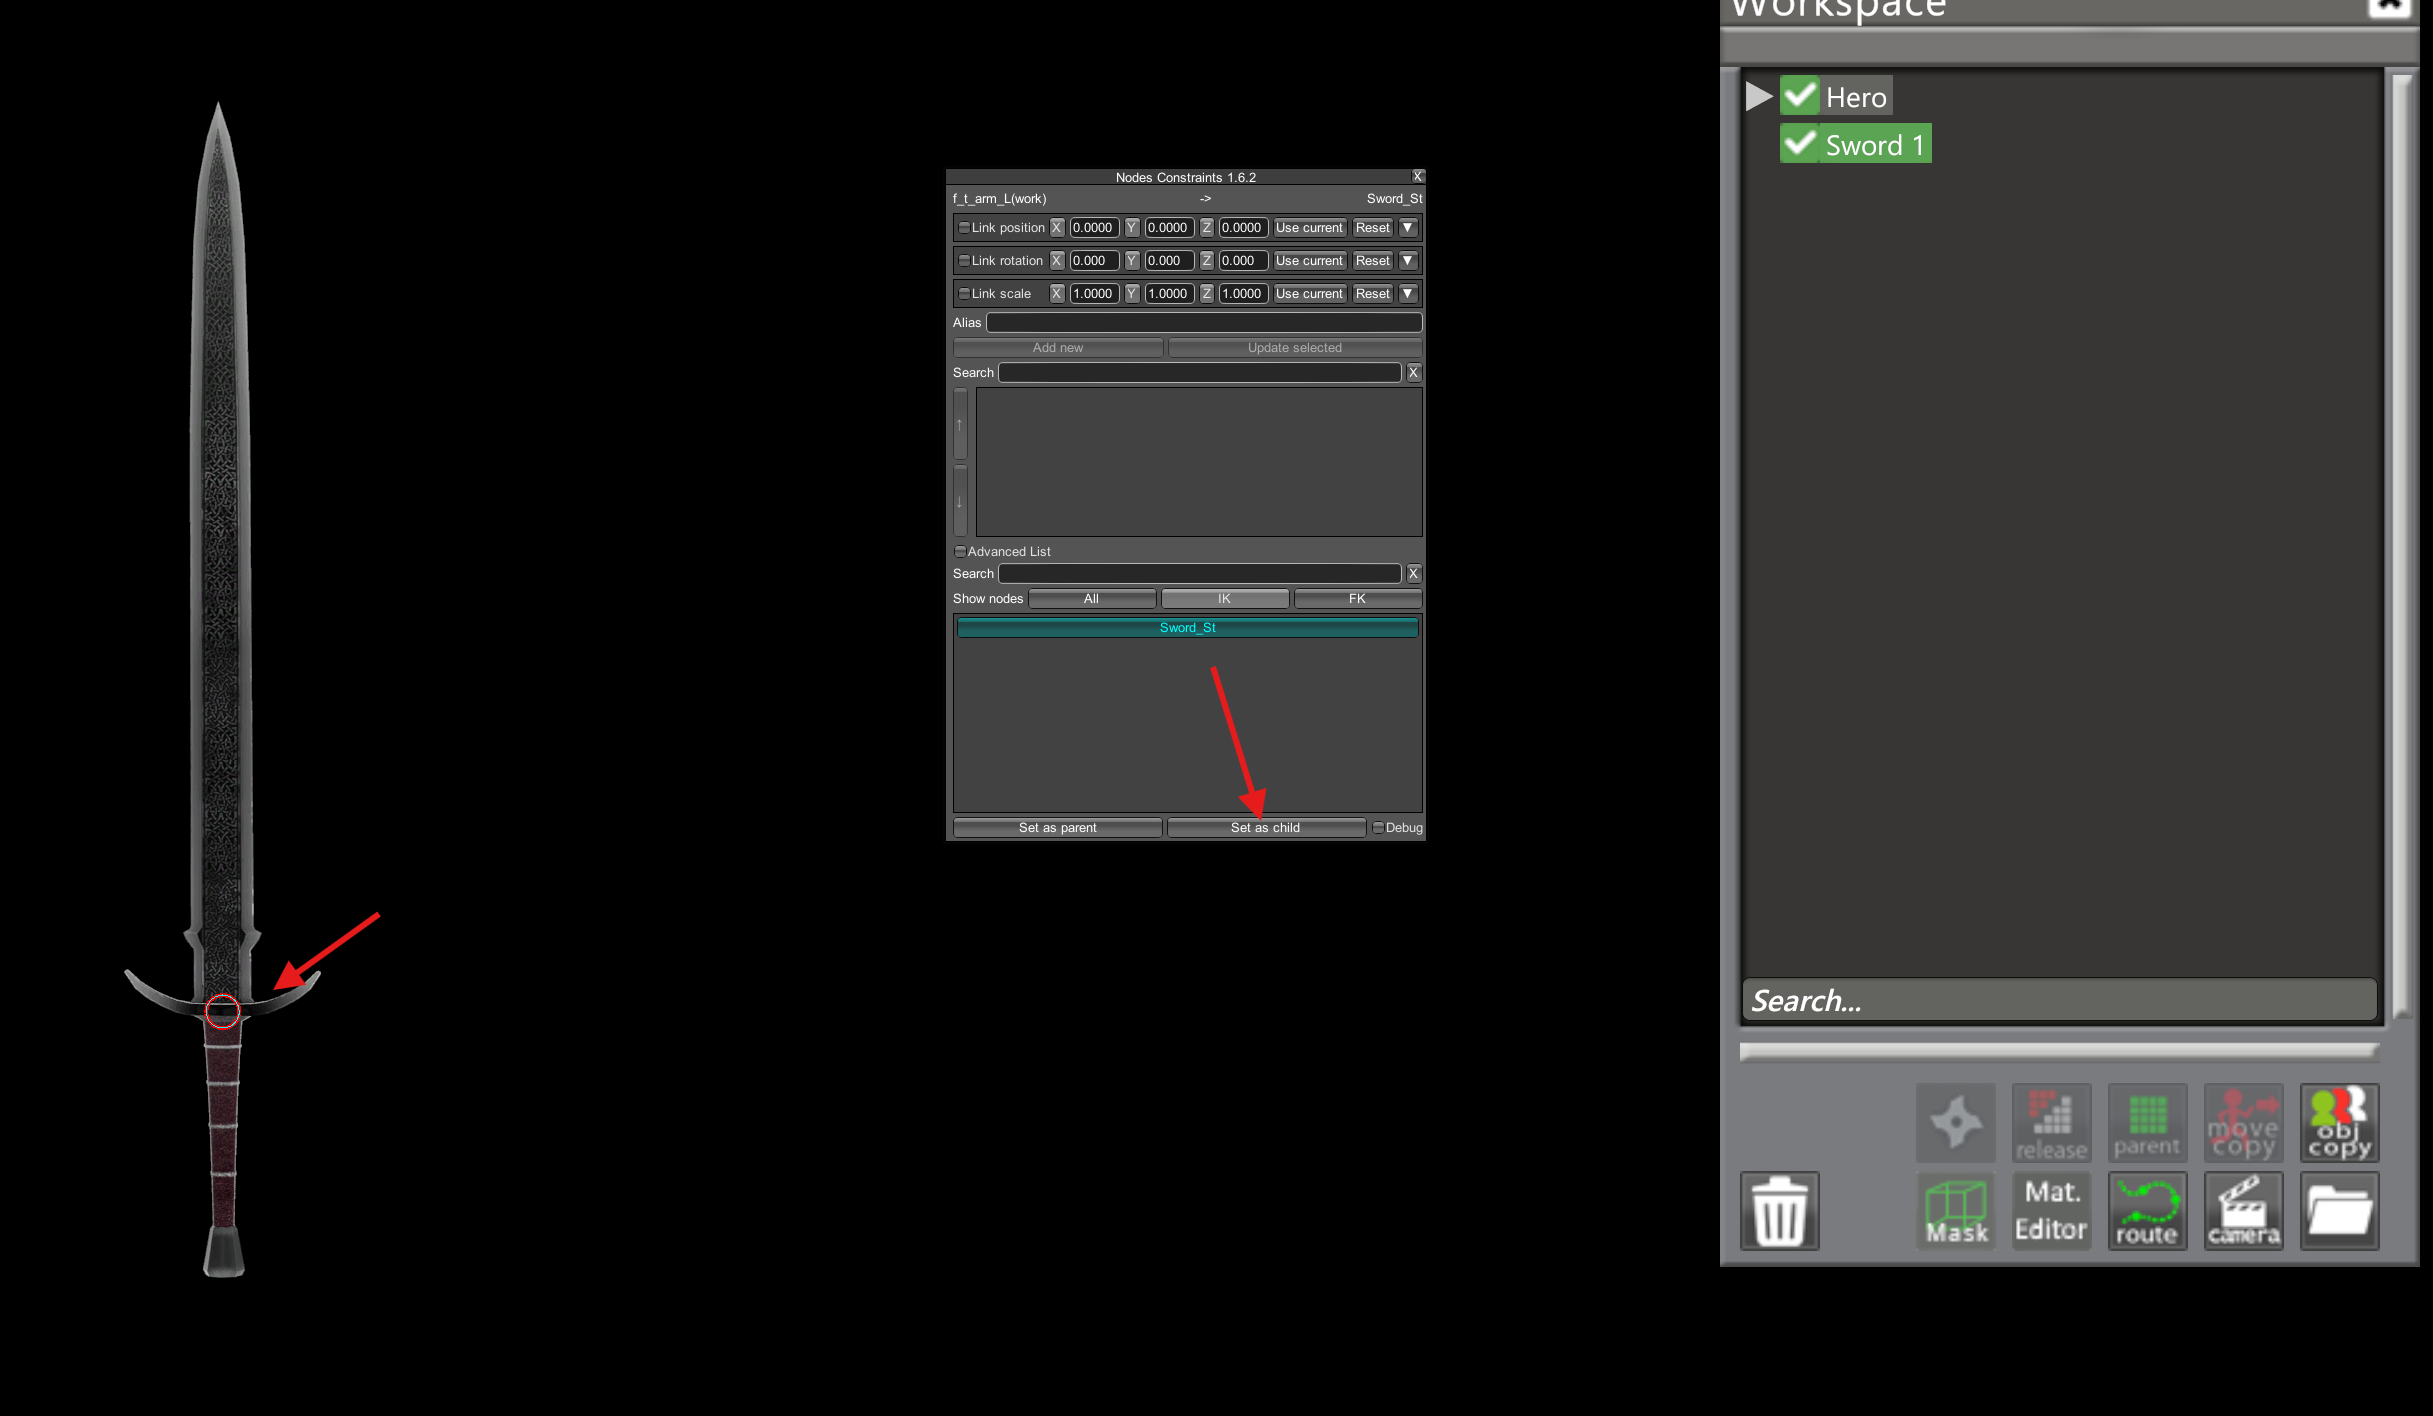
Now select your child (Sword 1, in this case) and pick the node you want to use as the child.
Once you’ve confirmed you have the right node, click Set as child. The circle turns red.
Choosing what follows
Decide whether position, rotation, and/or scale should follow the parent. You can pick more than one. Use the checkboxes next to Link position, Link rotation, and Link scale to turn each on.
If you want an offset from the parent, type it into the X, Y, or Z boxes. If you’d rather just use the child’s current position, rotation, or scale as-is, press Use current for whichever ones you want.
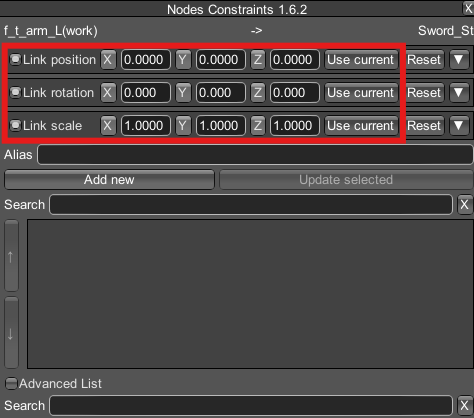
Once you’re happy with your choices, click Add new.
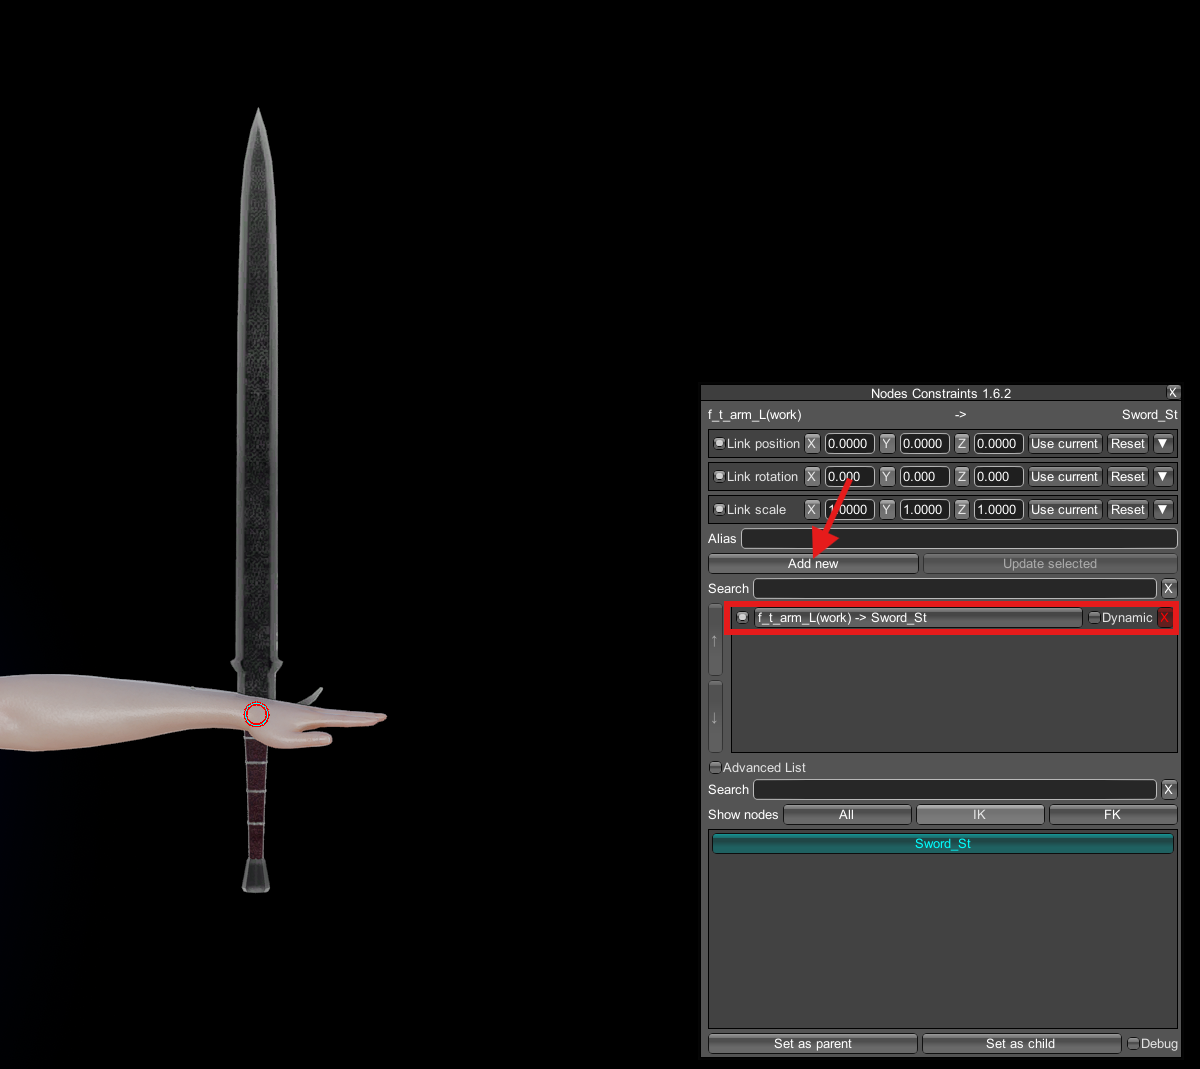
Done. The sword is now parented to Hero’s hand.