Blend shapes are how you push a face past the handful of built-in expressions and pose it exactly how you want, brow by brow, lid by lid. You edit them in Studio through HS2PE.
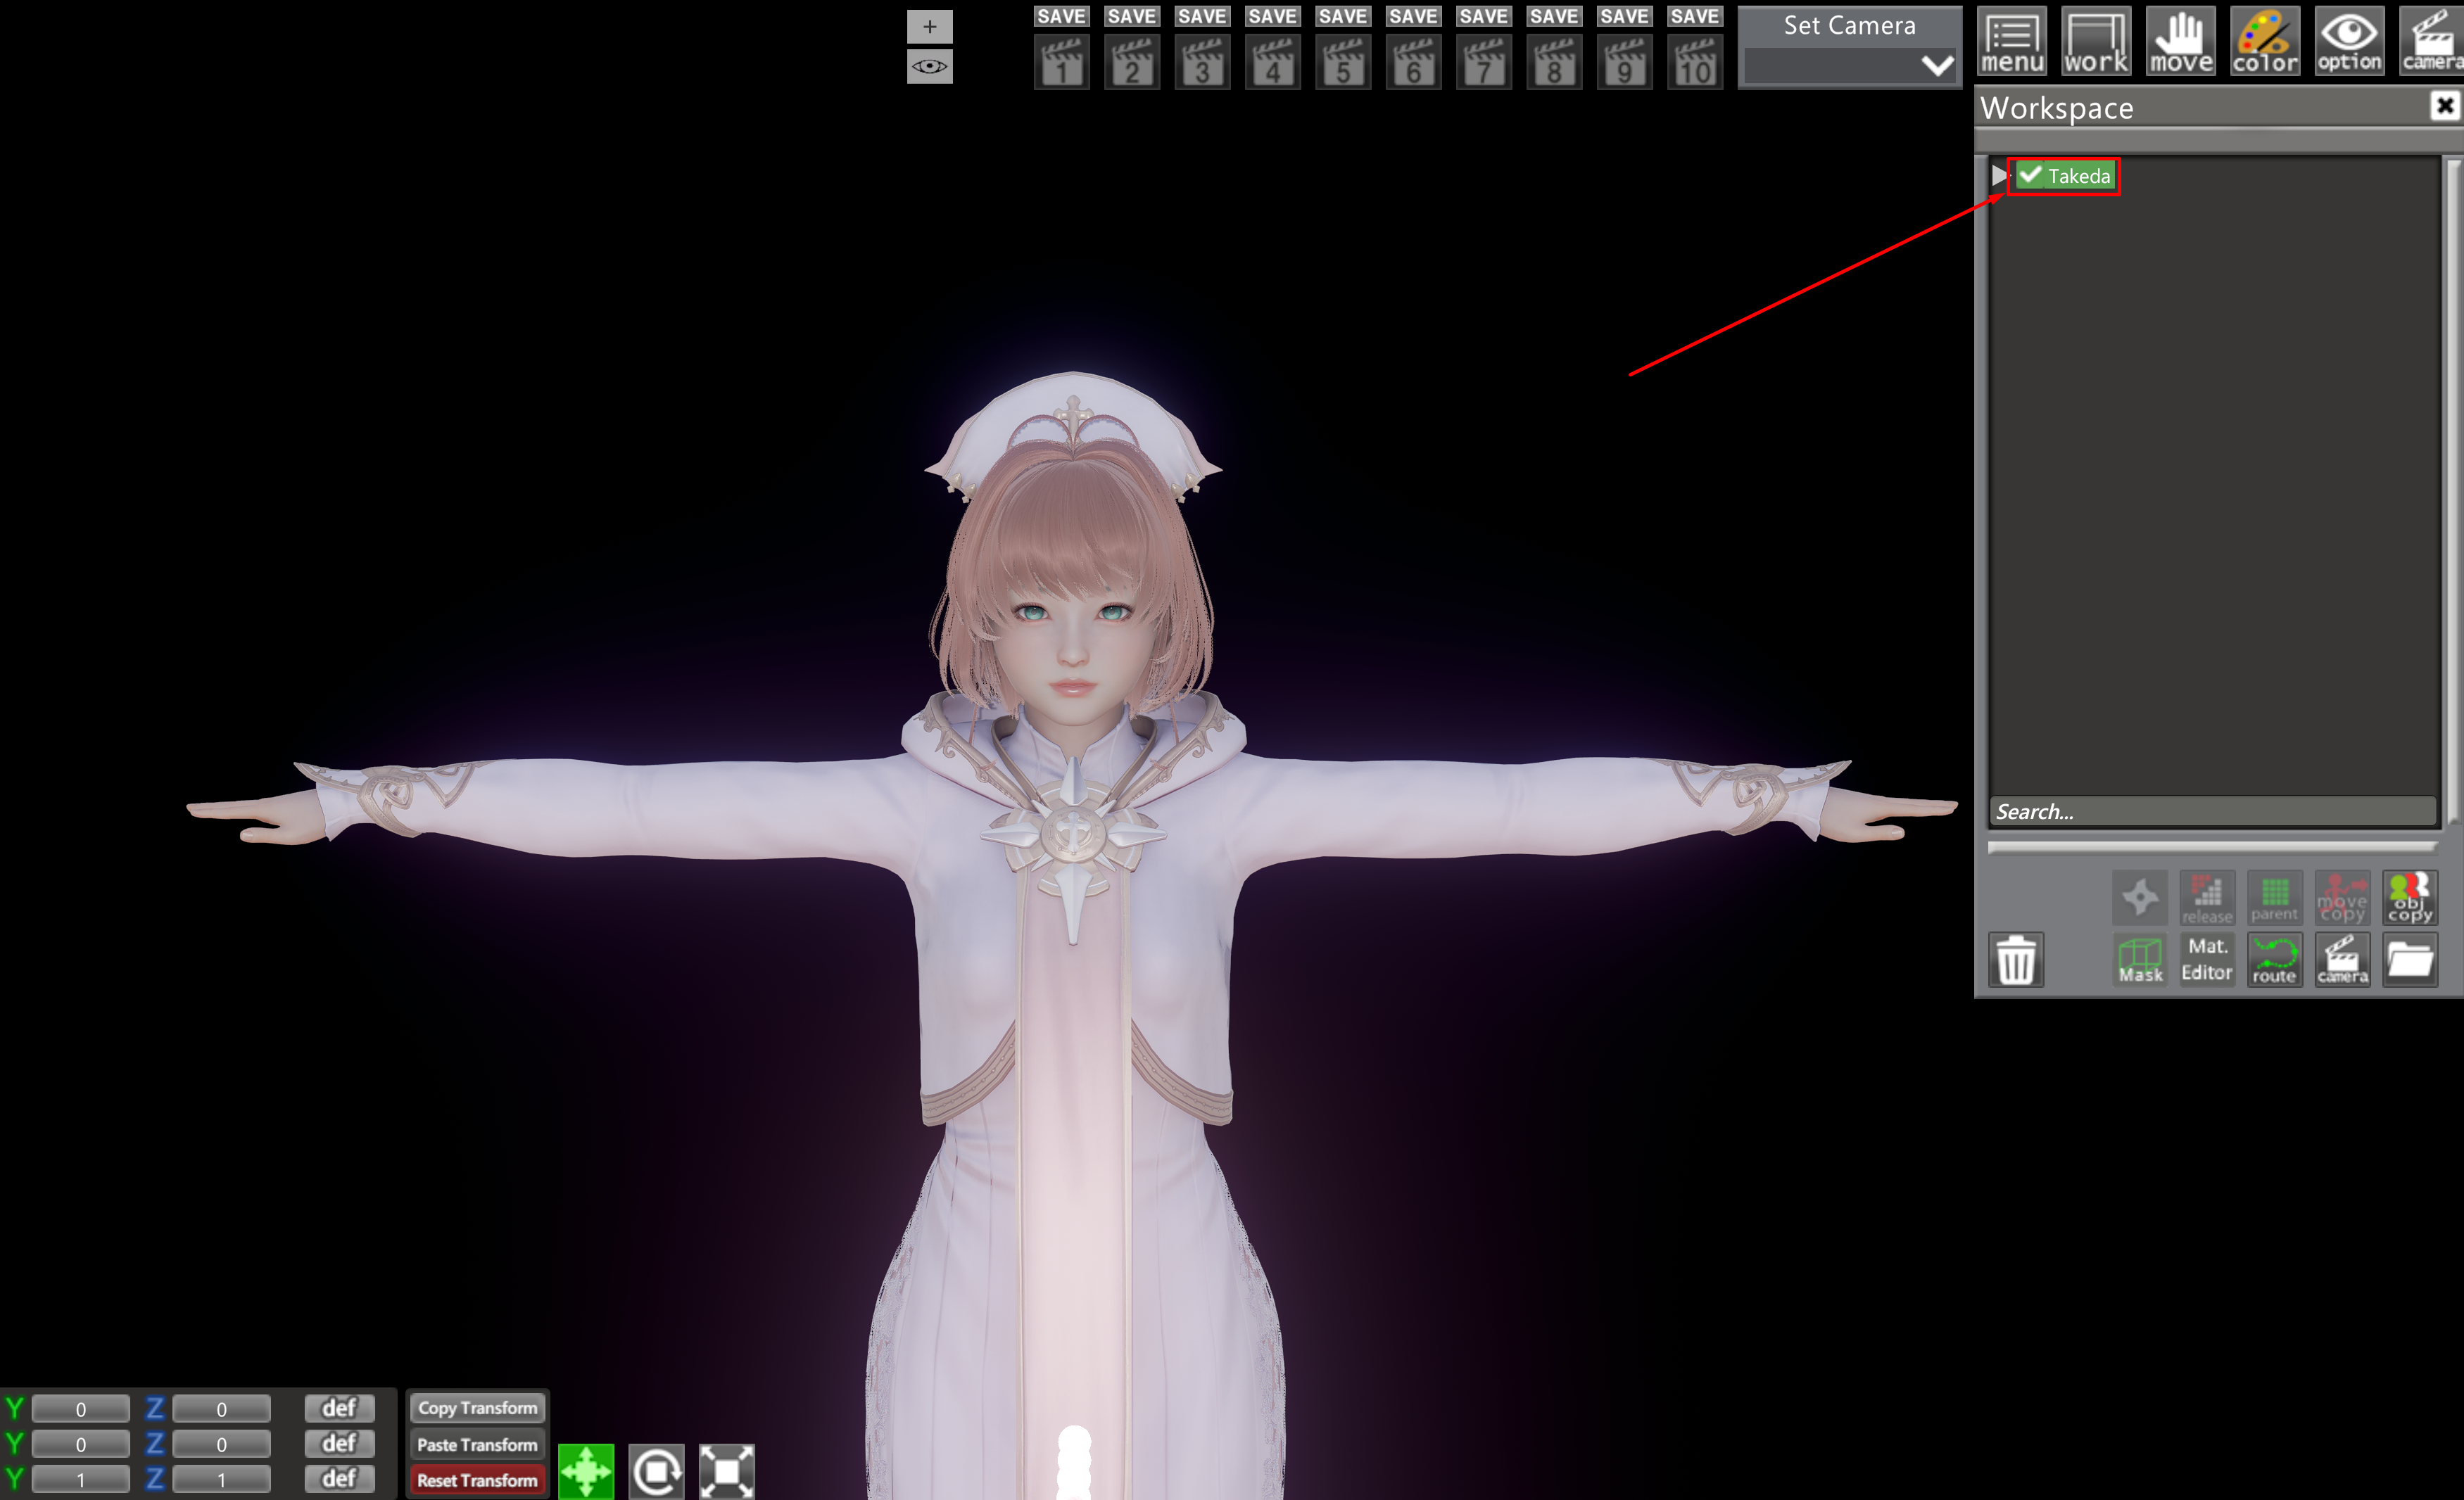
1. Spawn your character and select it
Add the character to the scene and make sure it’s selected in the workspace. HS2PE’s advanced tools always act on whatever is currently selected, so nothing will happen if nothing is picked.
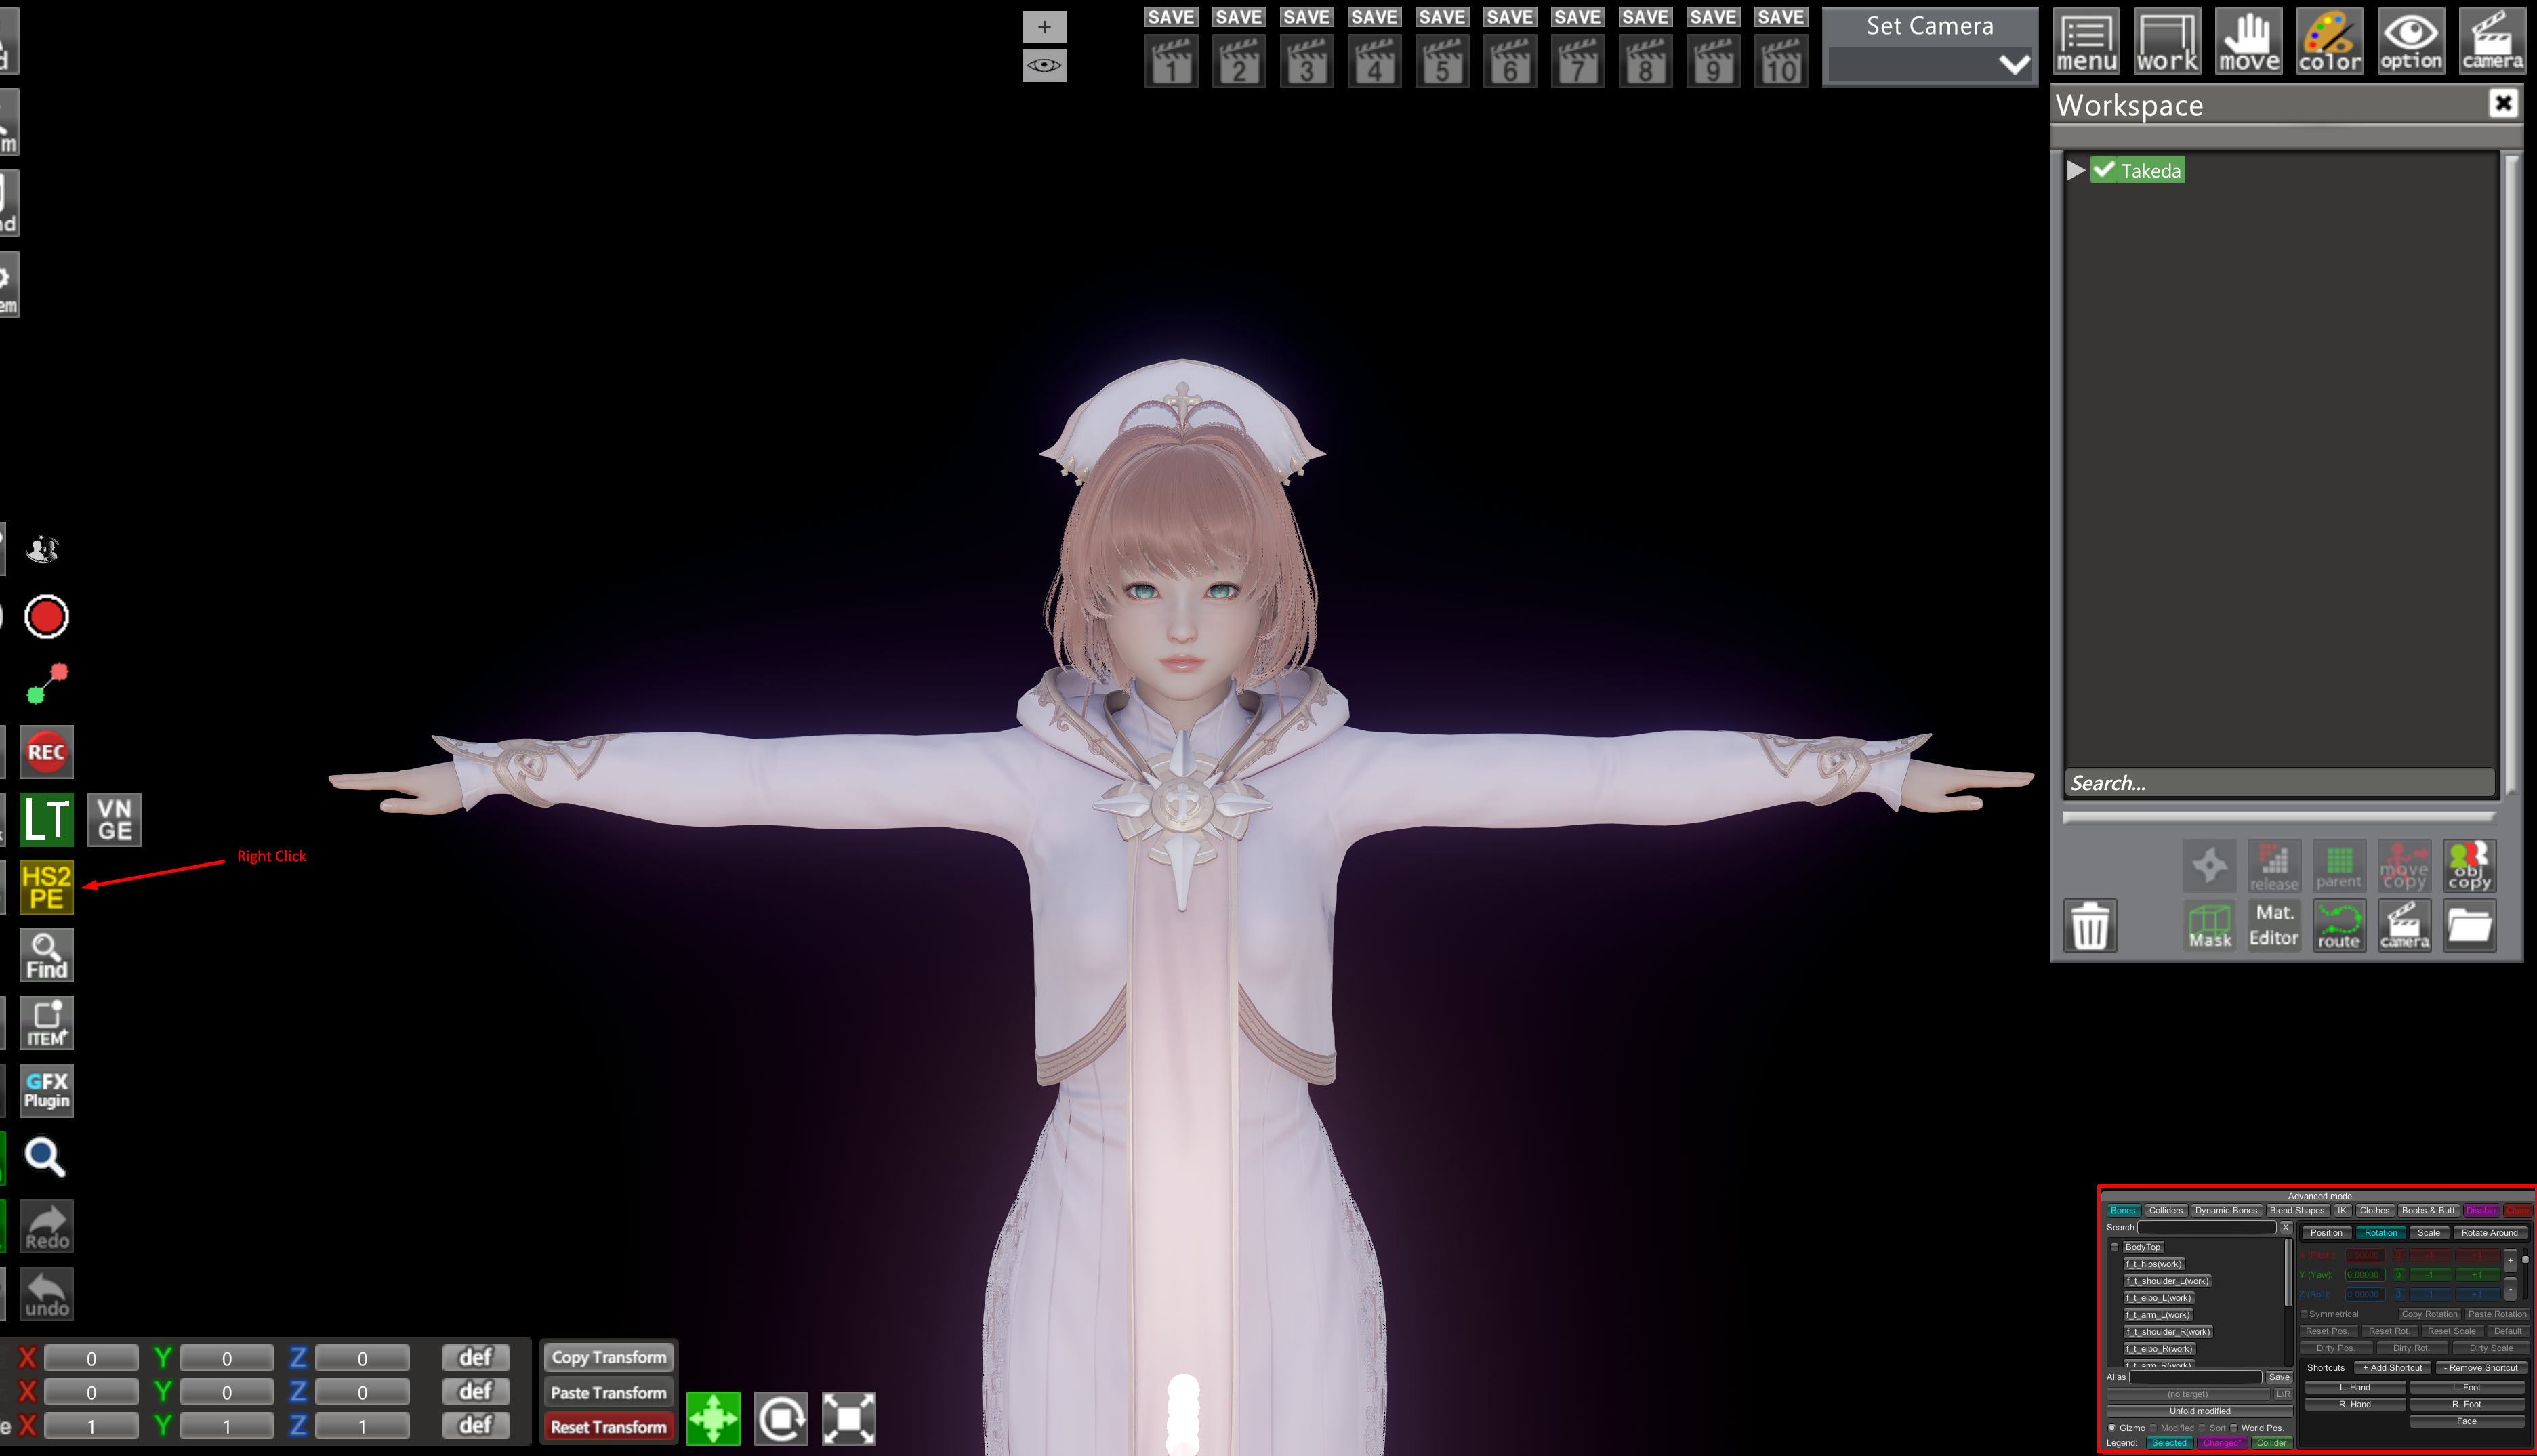
2. Right-click the HS2PE toolbox icon
Find the HS2PE button on the left Studio toolbar. The two clicks do different things, and this is where most people go wrong:
- Left-click opens the main PoseEditor window. That is not where blend shapes are.
- Right-click opens Advanced mode for the selected character. That is what you want.
The button tints to tell you the state: green when the main window is open, yellow when advanced mode is open, white when neither.
3. Open the Blend Shapes tab
Along the top of the Advanced mode window is a row of module tabs. Click Blend Shapes (the active tab
is highlighted cyan).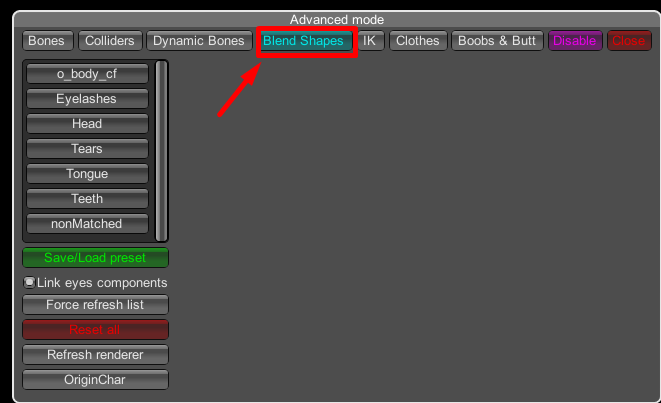
4. Pick which mesh you’re editing
On the left is a list of every mesh on the character that has blend shapes, with friendly names: Head is the face, plus Eyelashes, Tears, Tongue and Teeth. Click one to edit it. For expressions you’ll almost always want Head.
The colours are status cues: the selected mesh is cyan, and any mesh with unsaved edits turns
magenta with a * after its name.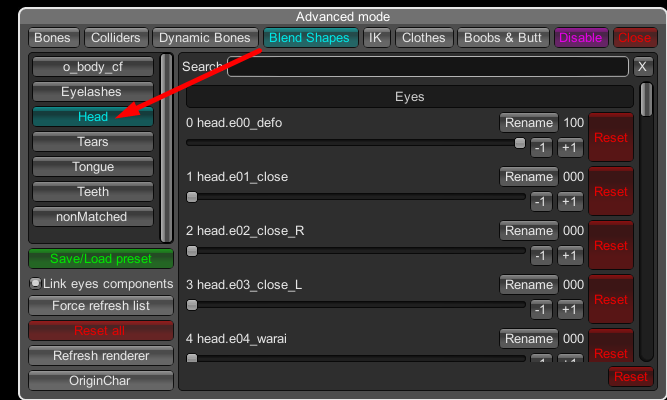
5. Dial in the expression
With Head selected, the right side fills with the blend shape list. On a face it’s split into Eyes, Eyebrows and Mouth sections.
- Each shape has a slider from 0 to 100. Drag it, or use the -1 / +1 buttons for single-unit nudges. Any shape you’ve touched turns magenta so you can see your changes at a glance.
- The Search box at the top filters the list live by name. Type “brow” or “mouth” to jump straight to what you want instead of scrolling.
- Rename next to a shape only changes the label for your own readability; it never touches the real blend shape, so it’s safe.
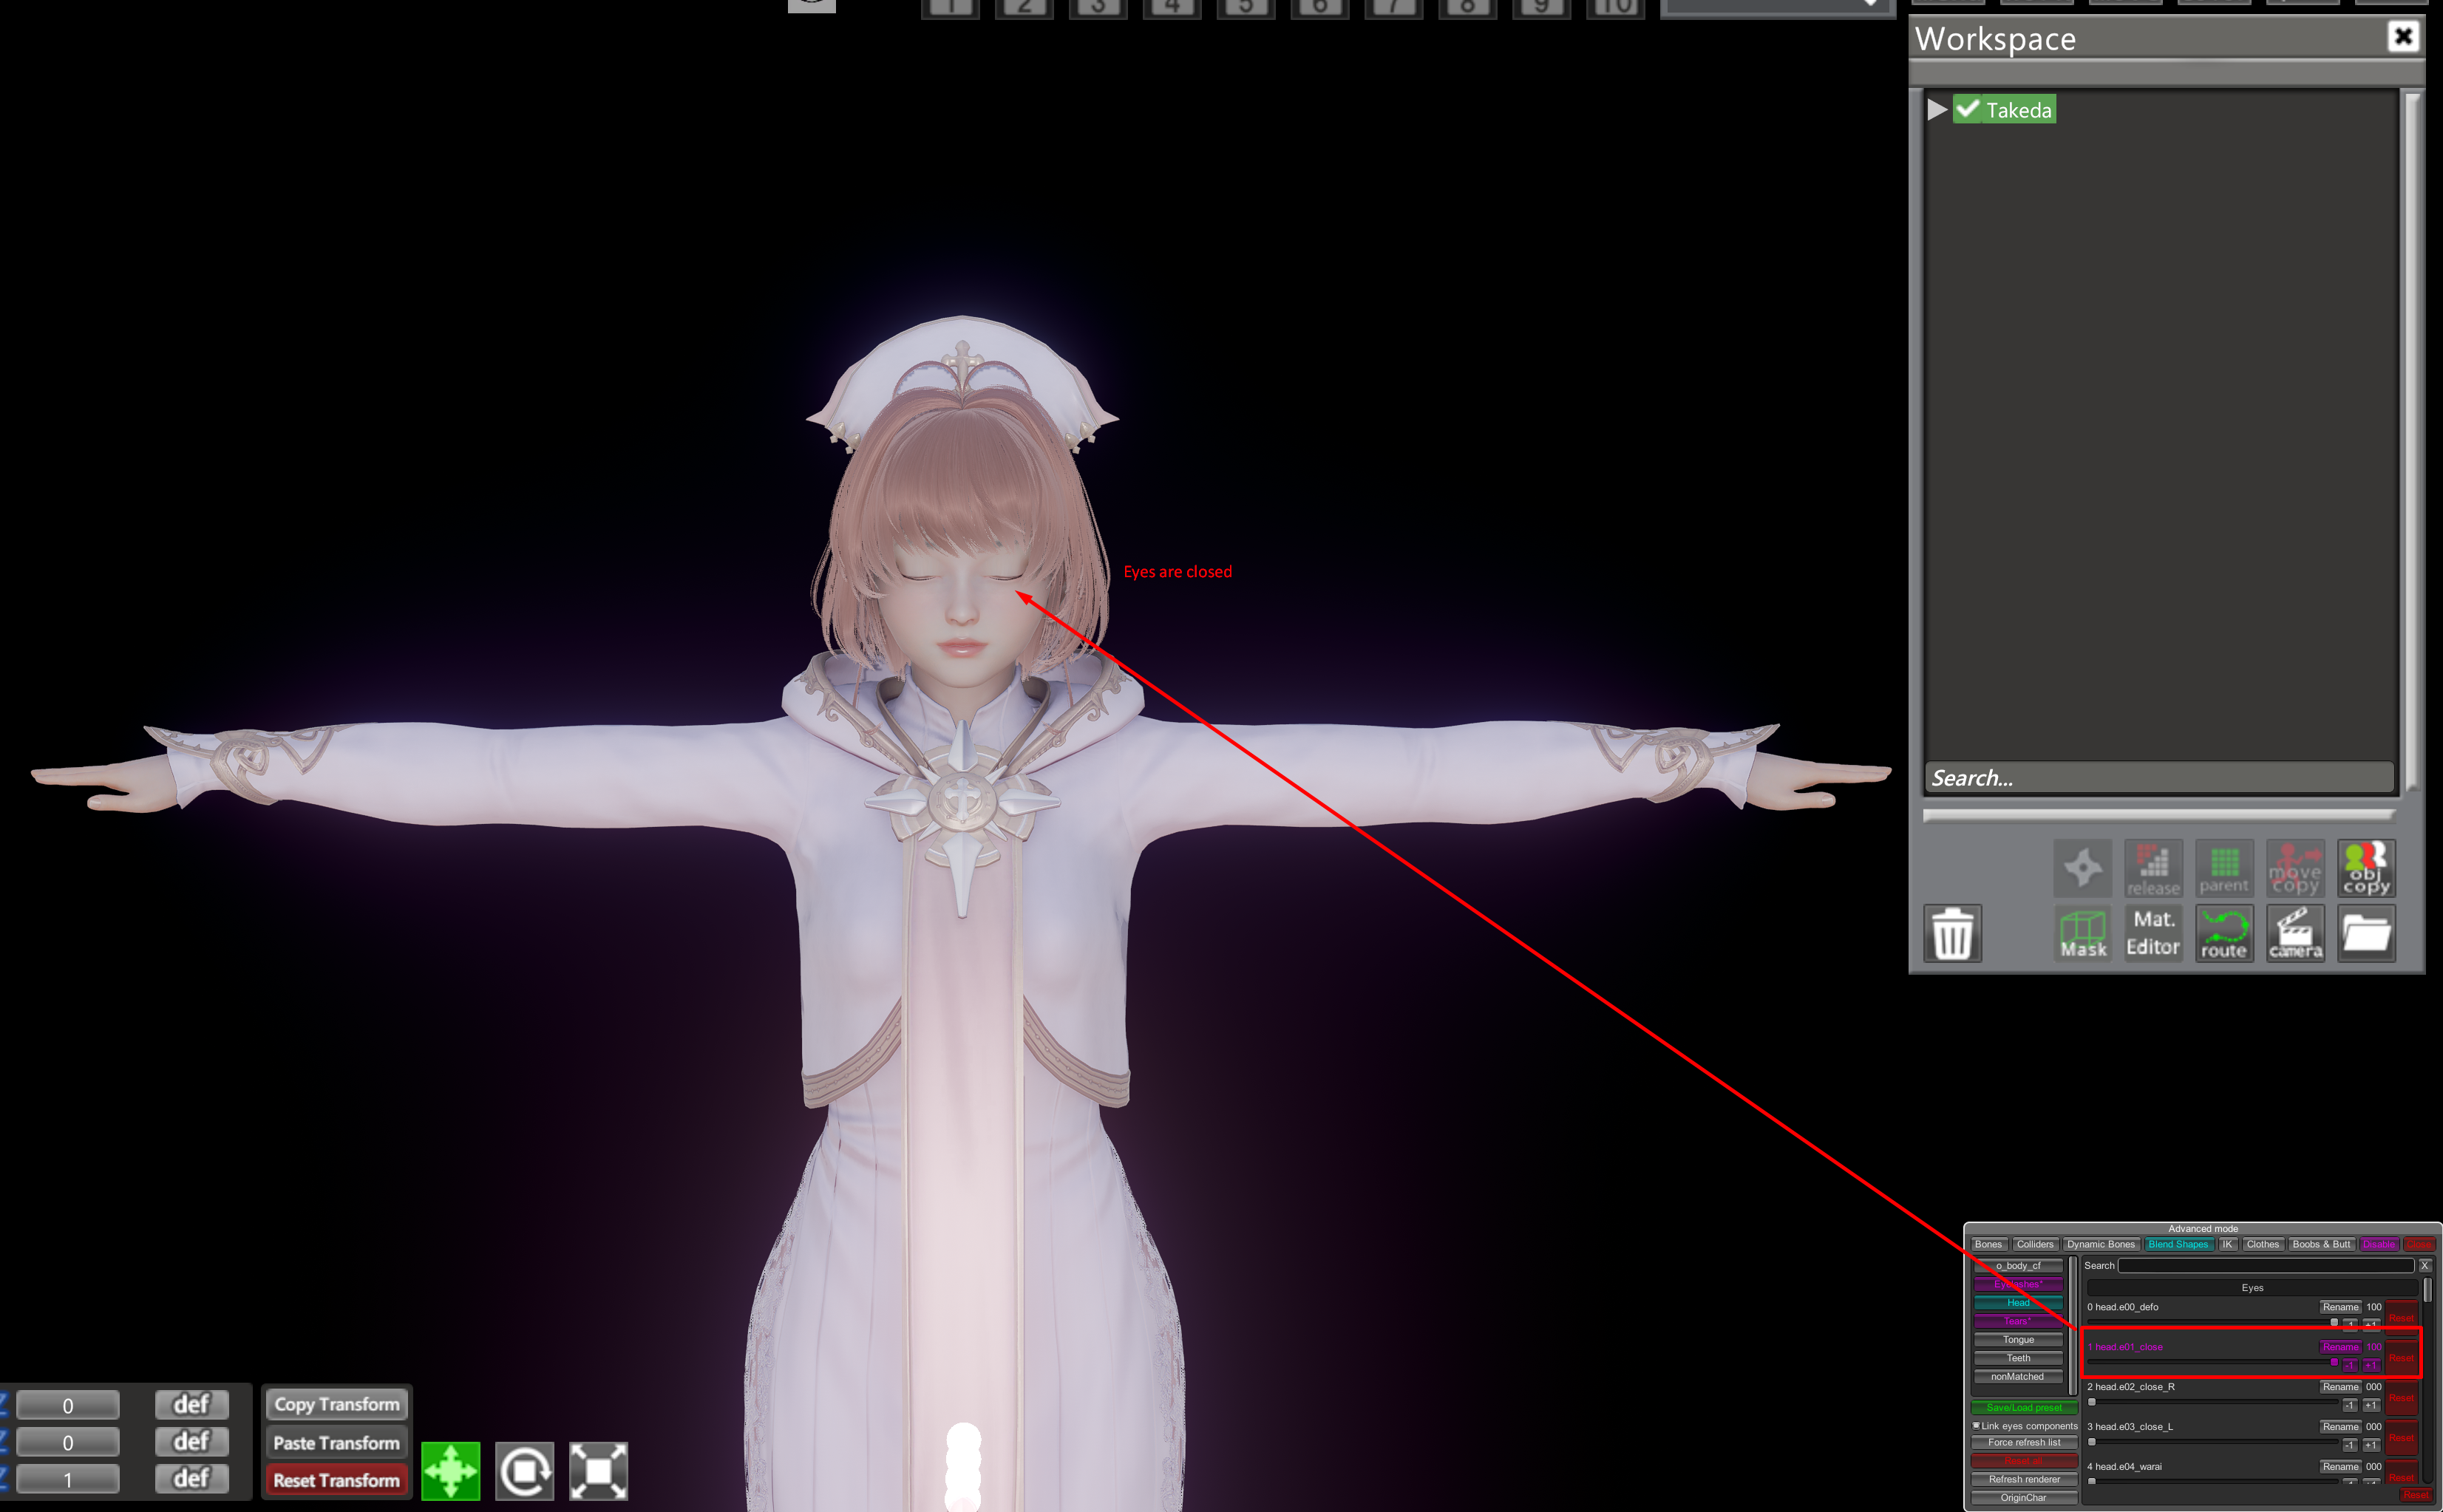
Link eyes components is on by default. That’s why nudging an eye shape on the Head can also move the eyelashes and tears to match, so the eyes stay consistent. Leave it on unless you specifically want to break that link.
6. Resetting (three different scopes)
Don’t mix these up:
- The red Reset at the end of a single row reverts just that one shape.
- The red Reset at the bottom of the list clears every edit on the current mesh.
- Reset all in the left column clears everything on the whole character, every mesh.
7. Save the expression as a preset
Blend shape edits already save with your scene, but you can also save an expression on its own to reuse on other characters. Click the green Save/Load preset button to open the Presets window.
- Type a name in the Name field and click Save. (The field turns red if the name already exists, as an overwrite warning.)
- To reuse one, click it in the list to load it.
- Open folder shows you where they live:
BepInEx/plugins/HS2PE/BlendShapesPresets.
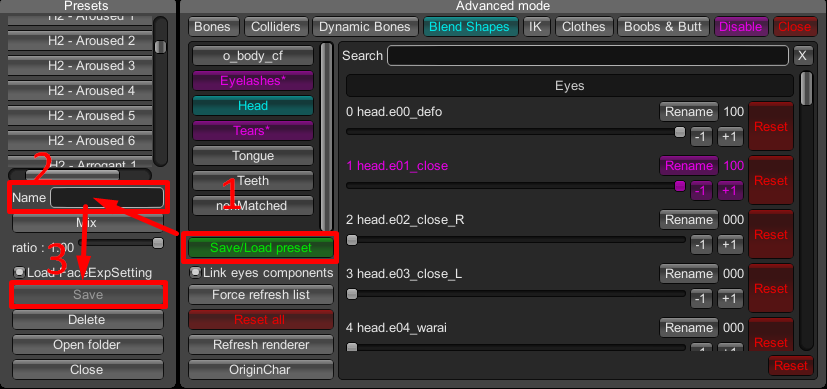
A preset only stores the shapes you actually edited, so loading one only touches those shapes and leaves the rest of the face alone. How it combines with the current face is set by the mix-mode button, which cycles Mix → Cross → Add → Subtract:
- Mix blends between the current face and the preset by a 0 to 1 ratio (1.0 fully replaces).
- Add sums them, capped at a max you set.
- Cross and Subtract are for combining two expressions with a priority side.
For simply applying a saved expression, leave it on Mix at ratio 1.
BlendShapesPresets folder that the BlendShape Preset Saver plugin writes
to, so anything it saves shows up in this list and loads through the same mix modes. If a freshly added
file isn't listed, close and reopen the Save/Load window to refresh it.