By ENY
Making convincing facial expressions encompasses more than just merely moving a few blendshape sliders left or right until it’s somewhat similar to a smile or a frown. It takes real, thought-through intention. It takes observational ability. A good read for integrating your own facial expressions into your work. Changing poses, shifting face parts, editing bones, and many more.
This tutorial will act as a base for your expressions to look less like a toss-up between a sex doll and an impressionist painting, and more like a full, come-to-life person.
Note that while this document explains multiple stages of improving the visual appeal of your character expressions, it might at times be wise to cut a few of them off, in order to prevent the wasting of much time. This isn’t as relevant for making individual renders, but if you’re using StudioNEO for game development, some elements of this guide might be antagonistic towards your work speed. Making a fully “decked out” facial expression with every step shown in this guide will drastically impact the amount of time you spend per render. Pick and choose which things you can feasibly incorporate into your workflow.
Step 0 - The Base
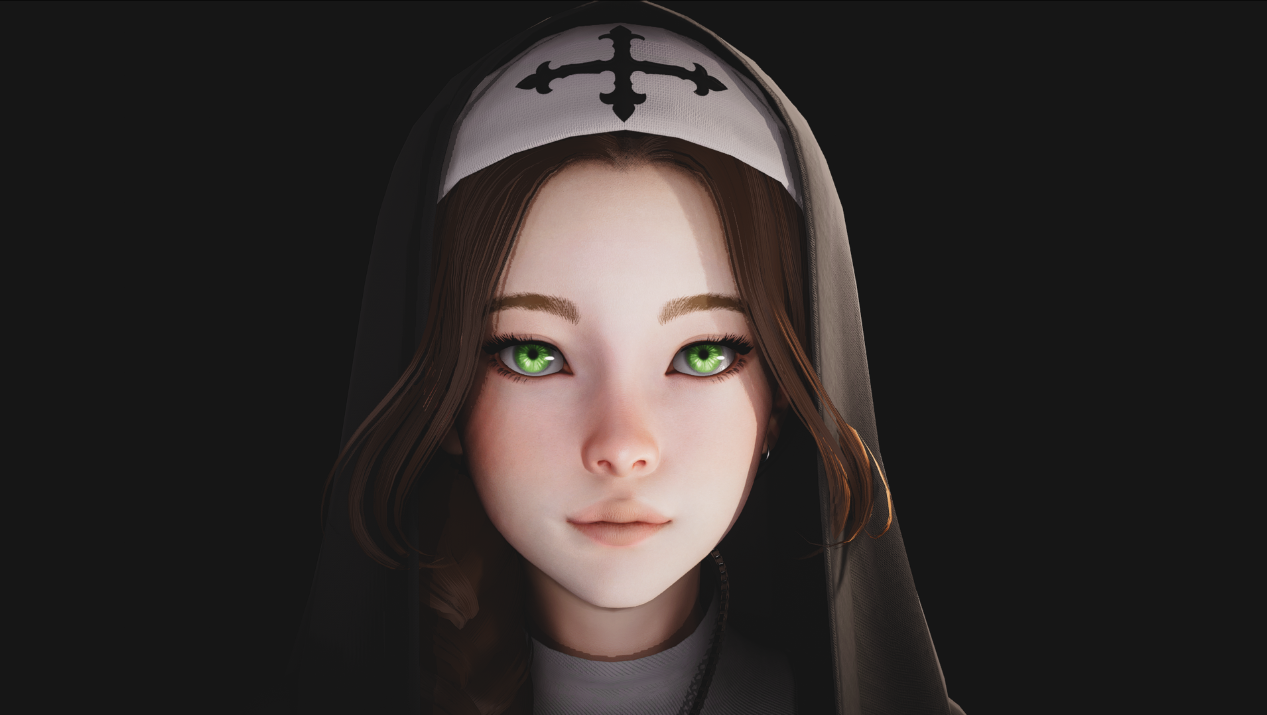
It’s important to realize that regardless of the visual changes you make to a character, if the base model isn’t visually appealing, the outcome will be less than satisfactory. Putting lipstick on a pig, and pulling its mouth up won’t make it look beautiful. It’ll just make it look like your aunt after her fifth shot at the family gathering.
This isn’t to say that you cannot have ugly characters. Expressions should make a character accentuate their already existing features:
- Cute characters should become more endearing.
- Beautiful characters should become more elegant.
- Masculine characters should become more firm and suave.
- Monstrous characters should become more foul.
No one is born taught with the perfect ability for capturing visual appeal. While some are better than others, I assure you that all of those, whose work you’ve seen, who might appear so far away in terms of skill level — every single one of them had to put in a lot of both time and effort to get to where they are. My point here might seem initially meaningless, but I’m making it in order to dissuade you from giving up if things don’t immediately go well.
If they do go well? Great. If they don’t? Keep trying.
Step 1 - Blendshapes
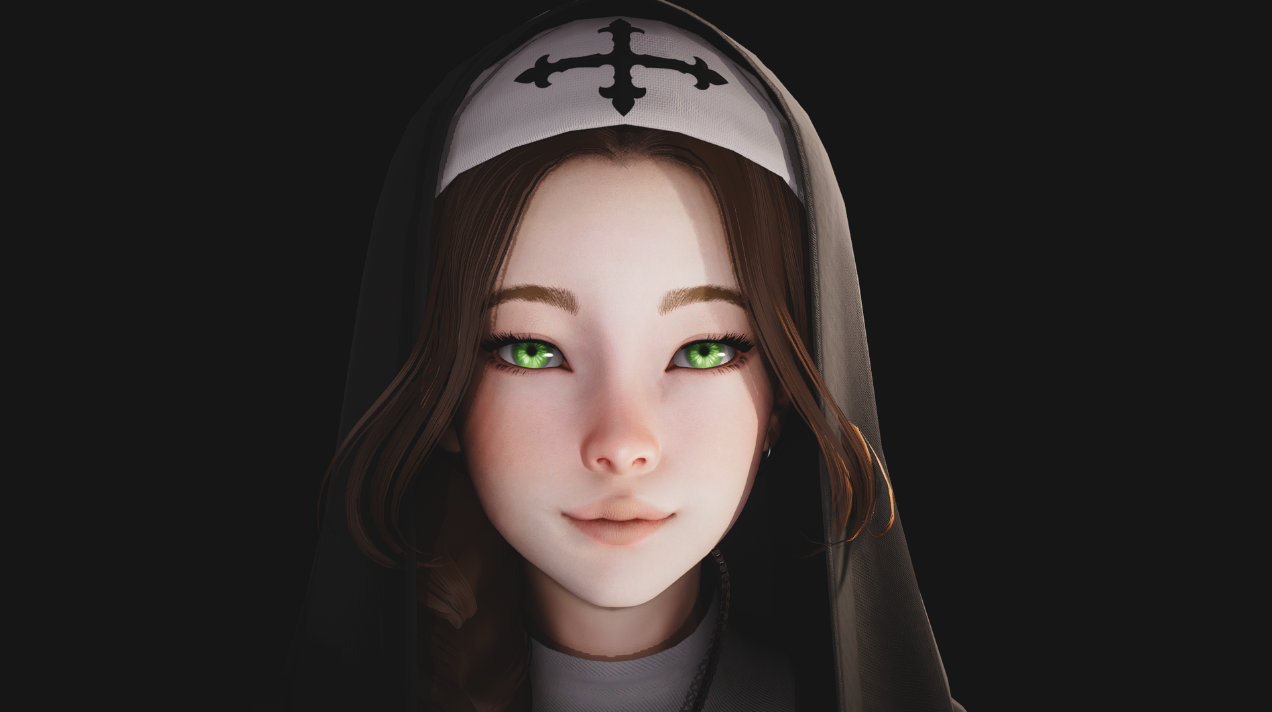
Let’s start with the most generic and easily understood expression. A warm smile.
Here are the slider values for the blendshapes for this facial expression(e=eyes, g=brows, k=mouth… so g_01_warai1 = brows_smile1, etc.):
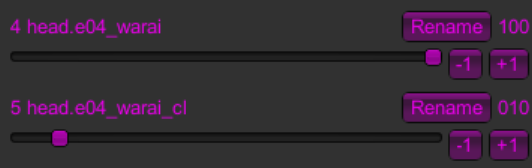

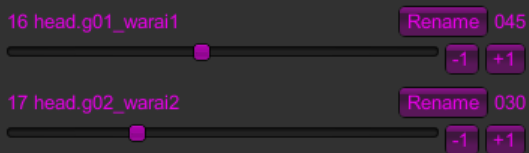






It is important to know that there is no one slider for any singular expression. Making expressions in StudioNEO will require you to play with a substantial amount of blendshapes, assuming you want to make something competent.
Why were each of these sliders used? Explanation:
Eyes:
- Warai - Lifts the lower eyelids up, mimicking the raised cheeks when smiling.
- Warai_cl - When the cheeks rise, the eyes close ever so slightly, thus we make a small adjustment.
- Odoroki - Closing the eyes creates too closed of an effect to one that we would ideally want, so we use the odoroki slider to widen the eyes just a tinge, in a way widens them without undoing the warai_cl slider’s work.
Brows:
- Warai1 and Warai2 - Both of these allow us to raise the eyebrows the way a smile would. Since the warai2 slider is stronger, we use it less prominently than warai1. Generally the sliders named 2 or 3 are stronger versions of the same-name sliders that have a 1.
- Kanasimi2 - The shape that the eyebrows take up is a bit from ideal, so we use the kanasimi sliders to get them more in order.
- Up - We use the “up” slider to get a bit more height on the eyebrows, in order not to use the warai eyebrow sliders too much, since aside from raising the brows, they also morph the shape. We want to retain a specific shape, while also raising them slightly. The “up” slider does the trick.
Mouth:
- Warai1 - The slider that rises the corners of the lips. Whether or not you go to 80 or 100 is up to personal taste.
- Fukure - Squeezes the lips slightly together horizontally, giving a more soft look.
- Rightup and Leftup - Finishing touches to get more of a smile out of the edges of the mouth.
The result is… okay.
It’s an expression. It gives the idea that we want.
…But it’s lacking something.
Step 2 - Advanced Bonemod
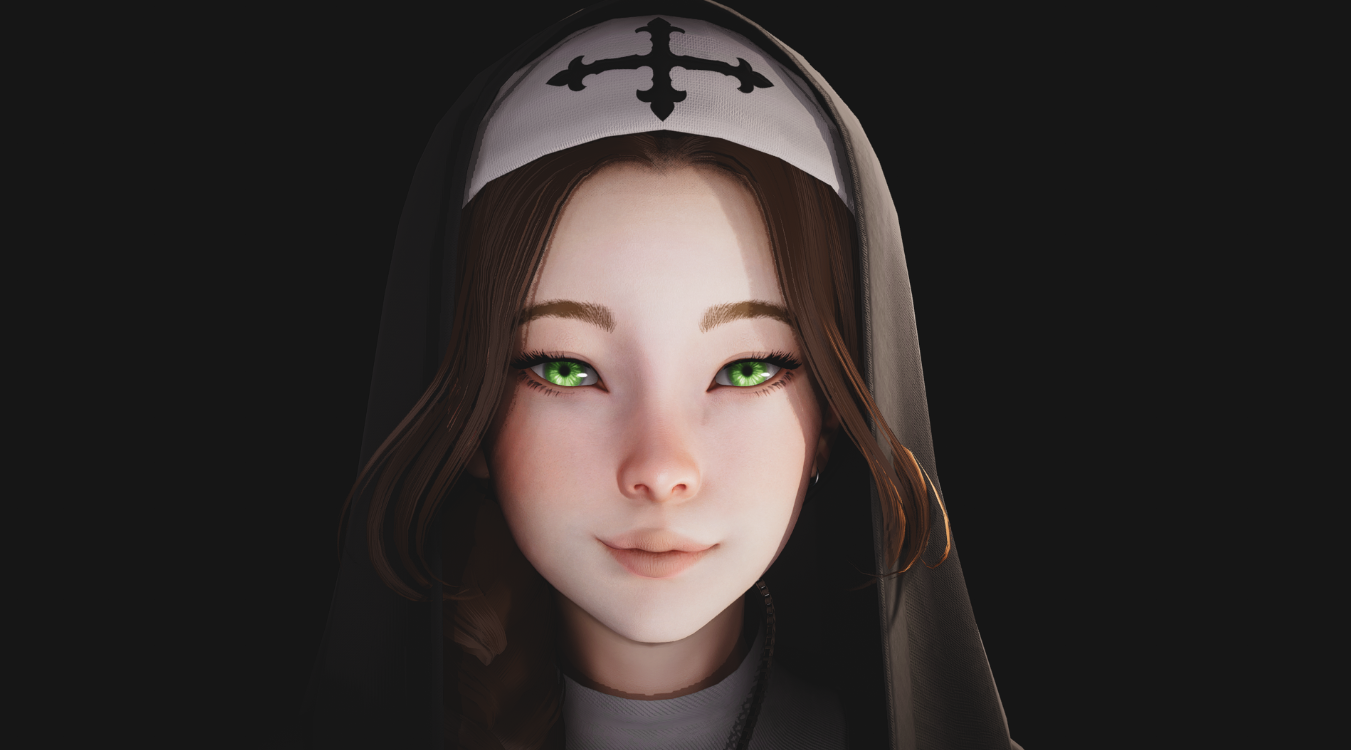
Let’s start with the mouth.
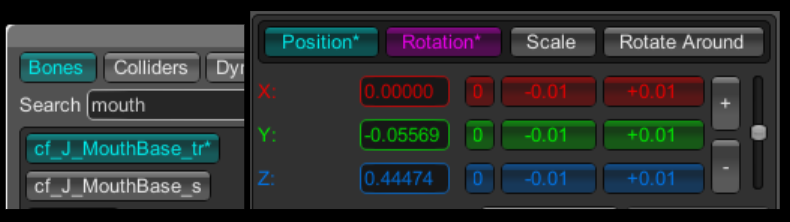
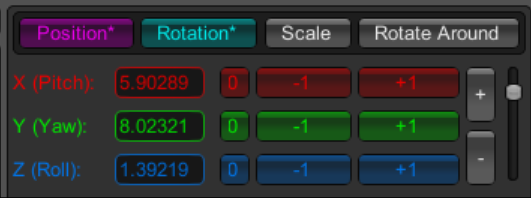
In HS2PE, we locate the “Bones” tab. We enter the word “mouth” into the search box. Several results show up. We want the one called: “cf_J_MouthBase_tr”. Click it. On the right side, another menu will light up. We’ll use the position and rotation tabs to make the mouth shape a little more interesting than it currently is.
- We adjust the position of the Y(up) axis ever so slightly to raise the lips, since a smile will naturally raise parts of your face, including the lips.
- We then adjust the Z(forward) axis to make the lips “balloon” a tinge outwards.
- Moving on, we go into the rotation tab.
- We move the X axis of the lips in order to tilt them downwards. This gives us a greater effect of a sort of happy sneering look.
- We adjust the Y axis to twist the lips towards one side, making the lips look more natural and less stiff.
- We slightly change the Z axis to rotate the lips towards one side, more than the other. Gentle asymmetry on the lips is a good way to get rid of stiffness and make the facial expression radiate a more approachable and likeable look.
Alternatively! Link
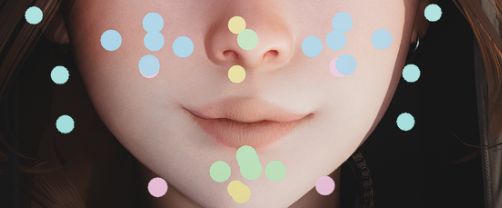
You can use Zolteq’s bone visualizer. The free version of his amazing plugin does everything we need it to do to make good facial expressions. It allows us to do away with the number pressing and menu navigation, and simply dragging and rotating nodes, instead. Although it might take a bit more practice, it is without a doubt significantly faster. Do whatever fits you.
Eyes:
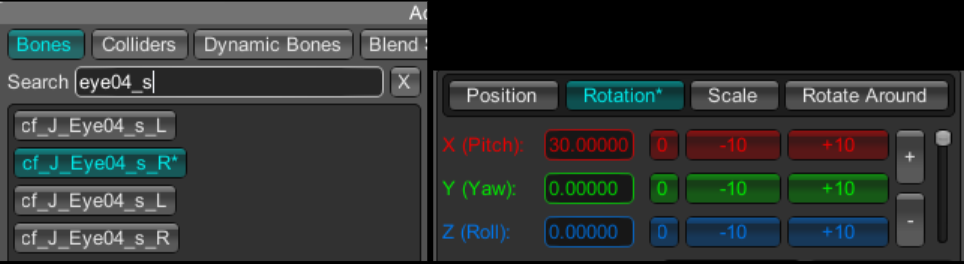
If using Bone Visualizer
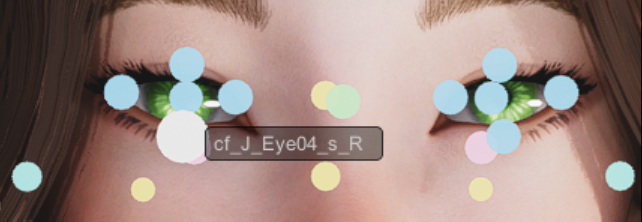
We once again navigate HS2PE(or bone visualizer, in which case you rotate the same name bones), open the bones menu, type in: “eye04_s” and rotate the X axis of both the TOPMOST cf_J_Eye04_s_R (right eye’s lower, outer eyelid) and cf_J_Eye04_s_L (left eye’s lower, outer eyelid) to about 30 degrees. Make sure you’re using the topmost bones. The ones underneath them with an identical name do nothing.
With all of this, we’ve got a pretty sincere and light hearted smile. But that’s about it.
What sells a good expression doesn’t lie entirely on the face. Its surroundings have to match it, as well.
Step 3 - Body Expression
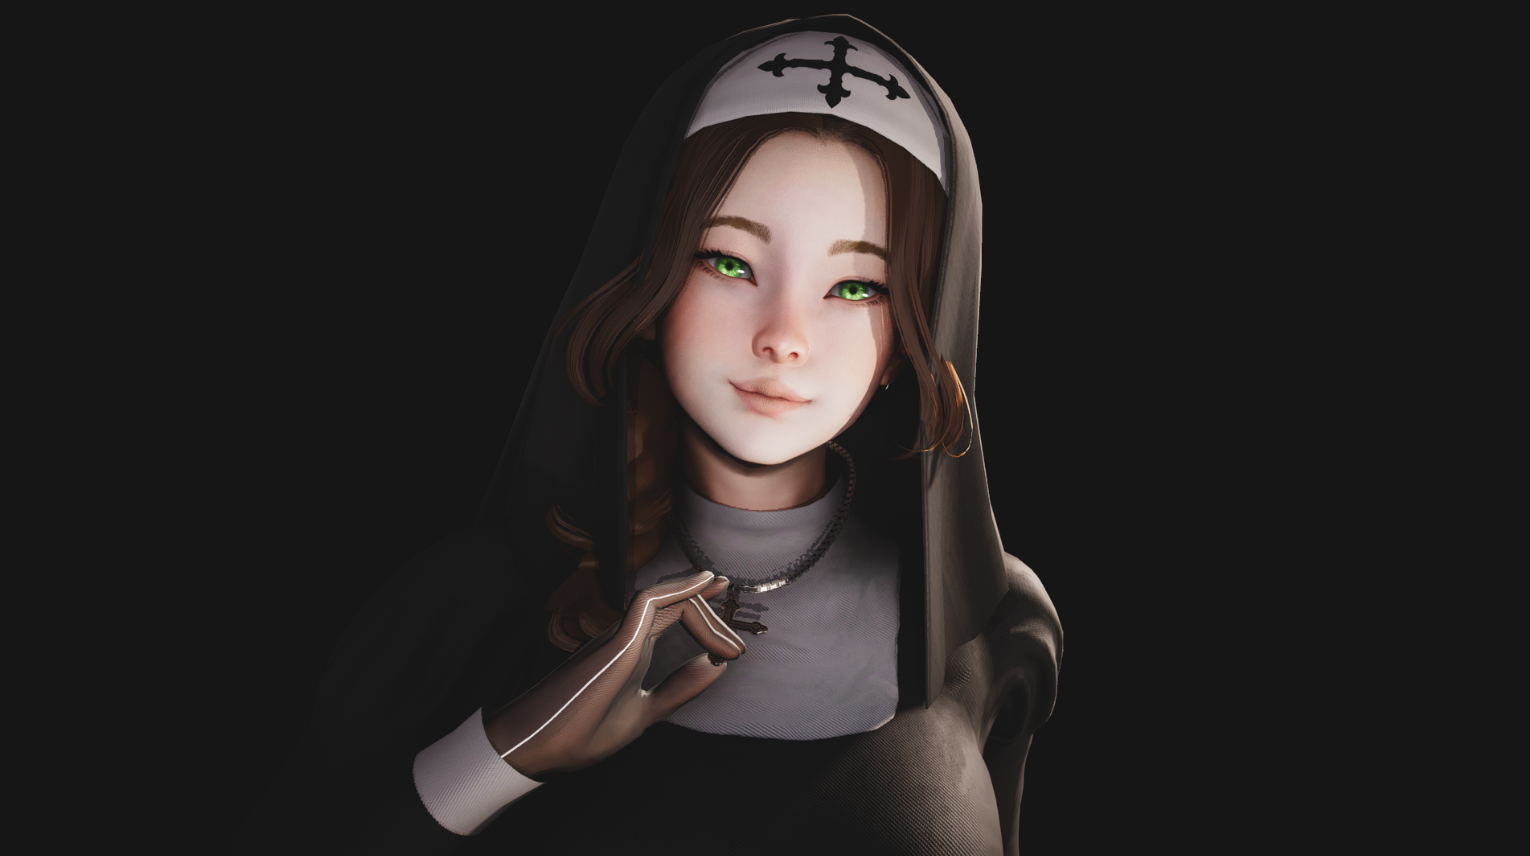
In almost every case, in order to fully sell the facial expression, the character’s demeanor has to be consistent. Meaning, the face has to match the body. From this alone we can already start thinking of scenarios in which the current scenario is being depicted.
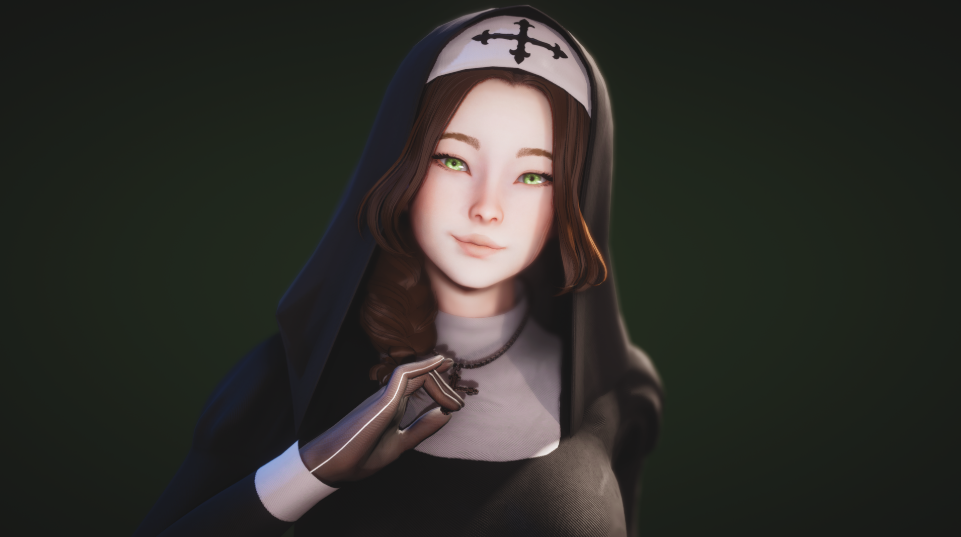
The nun is holding her necklace and smiling. Is she thinking of someone?
She’s looking straight ahead. Is she looking at someone in front of her? She seems happy to see them.
Multiple scenarios and ideas can be drawn from just this much. Never forget to properly pose your character. It is essential to selling the idea!
Freelancer (check him out!) and many other people in the Illusion discord server post very useful and frequent bundles of poses for you to use and choose from if you do not wish to make every single pose for every expression.
Even so, there are still some minor issues with this image. Let’s tackle them next.
Step 4 - Hair and Clothes
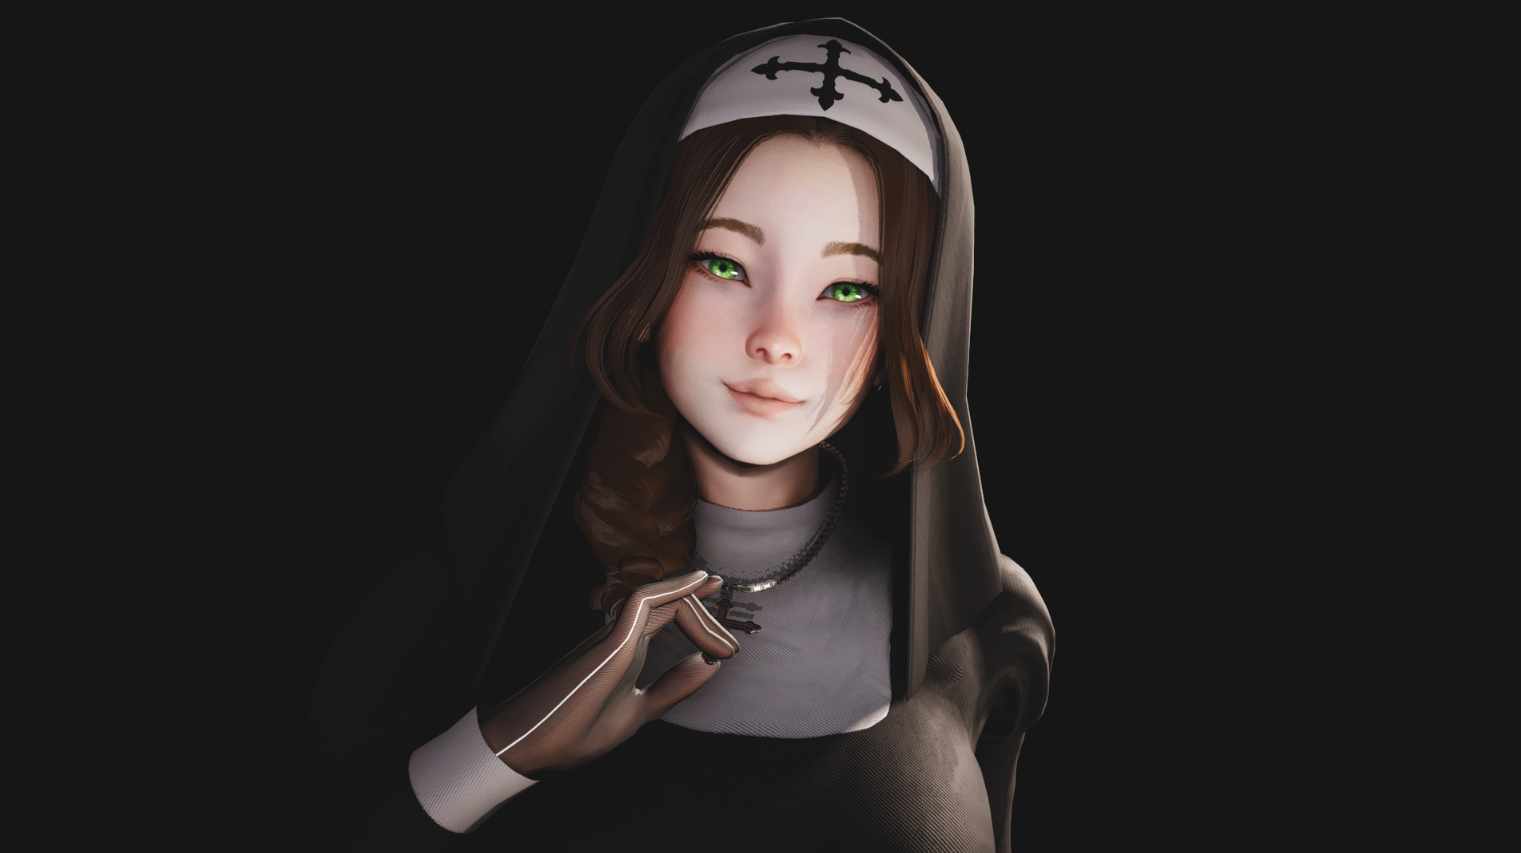
We fix the hair clipping using HS2PE’s dynamic bones. Most hairs have some degree of hair manipulation. Moving it -200 in the X axis does the trick, and the hair now seems as though it follows gravity far more convincingly. Moreover, using the very same dynamic bones, we can adjust the nun’s habit a tiny bit, in order to prevent parts of the hair from clipping into the clothes. This headpiece has 6 dynamic bones available, and we manipulate them until we get the desired result.
Hair:
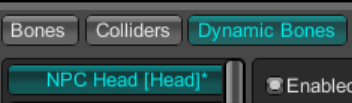
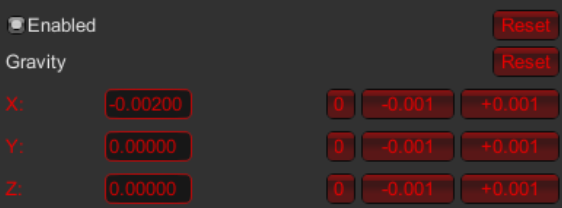
Habit:
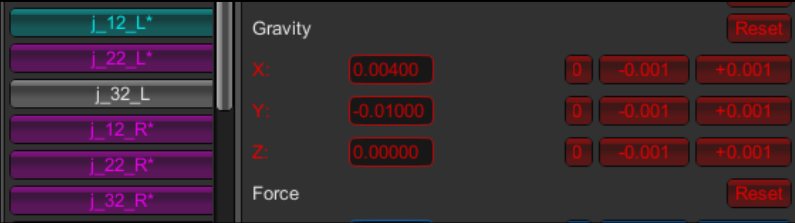
We’ve sorted out all of the exterior parts of this image, but we’ve yet to properly touch up the lighting. Changing the pose has messed up the lighting, and now we need to fix it. But instead of returning the lighting to its original framing, let’s use this opportunity to sell the expression even more using said lighting.
Step 5 - Finishing Touches
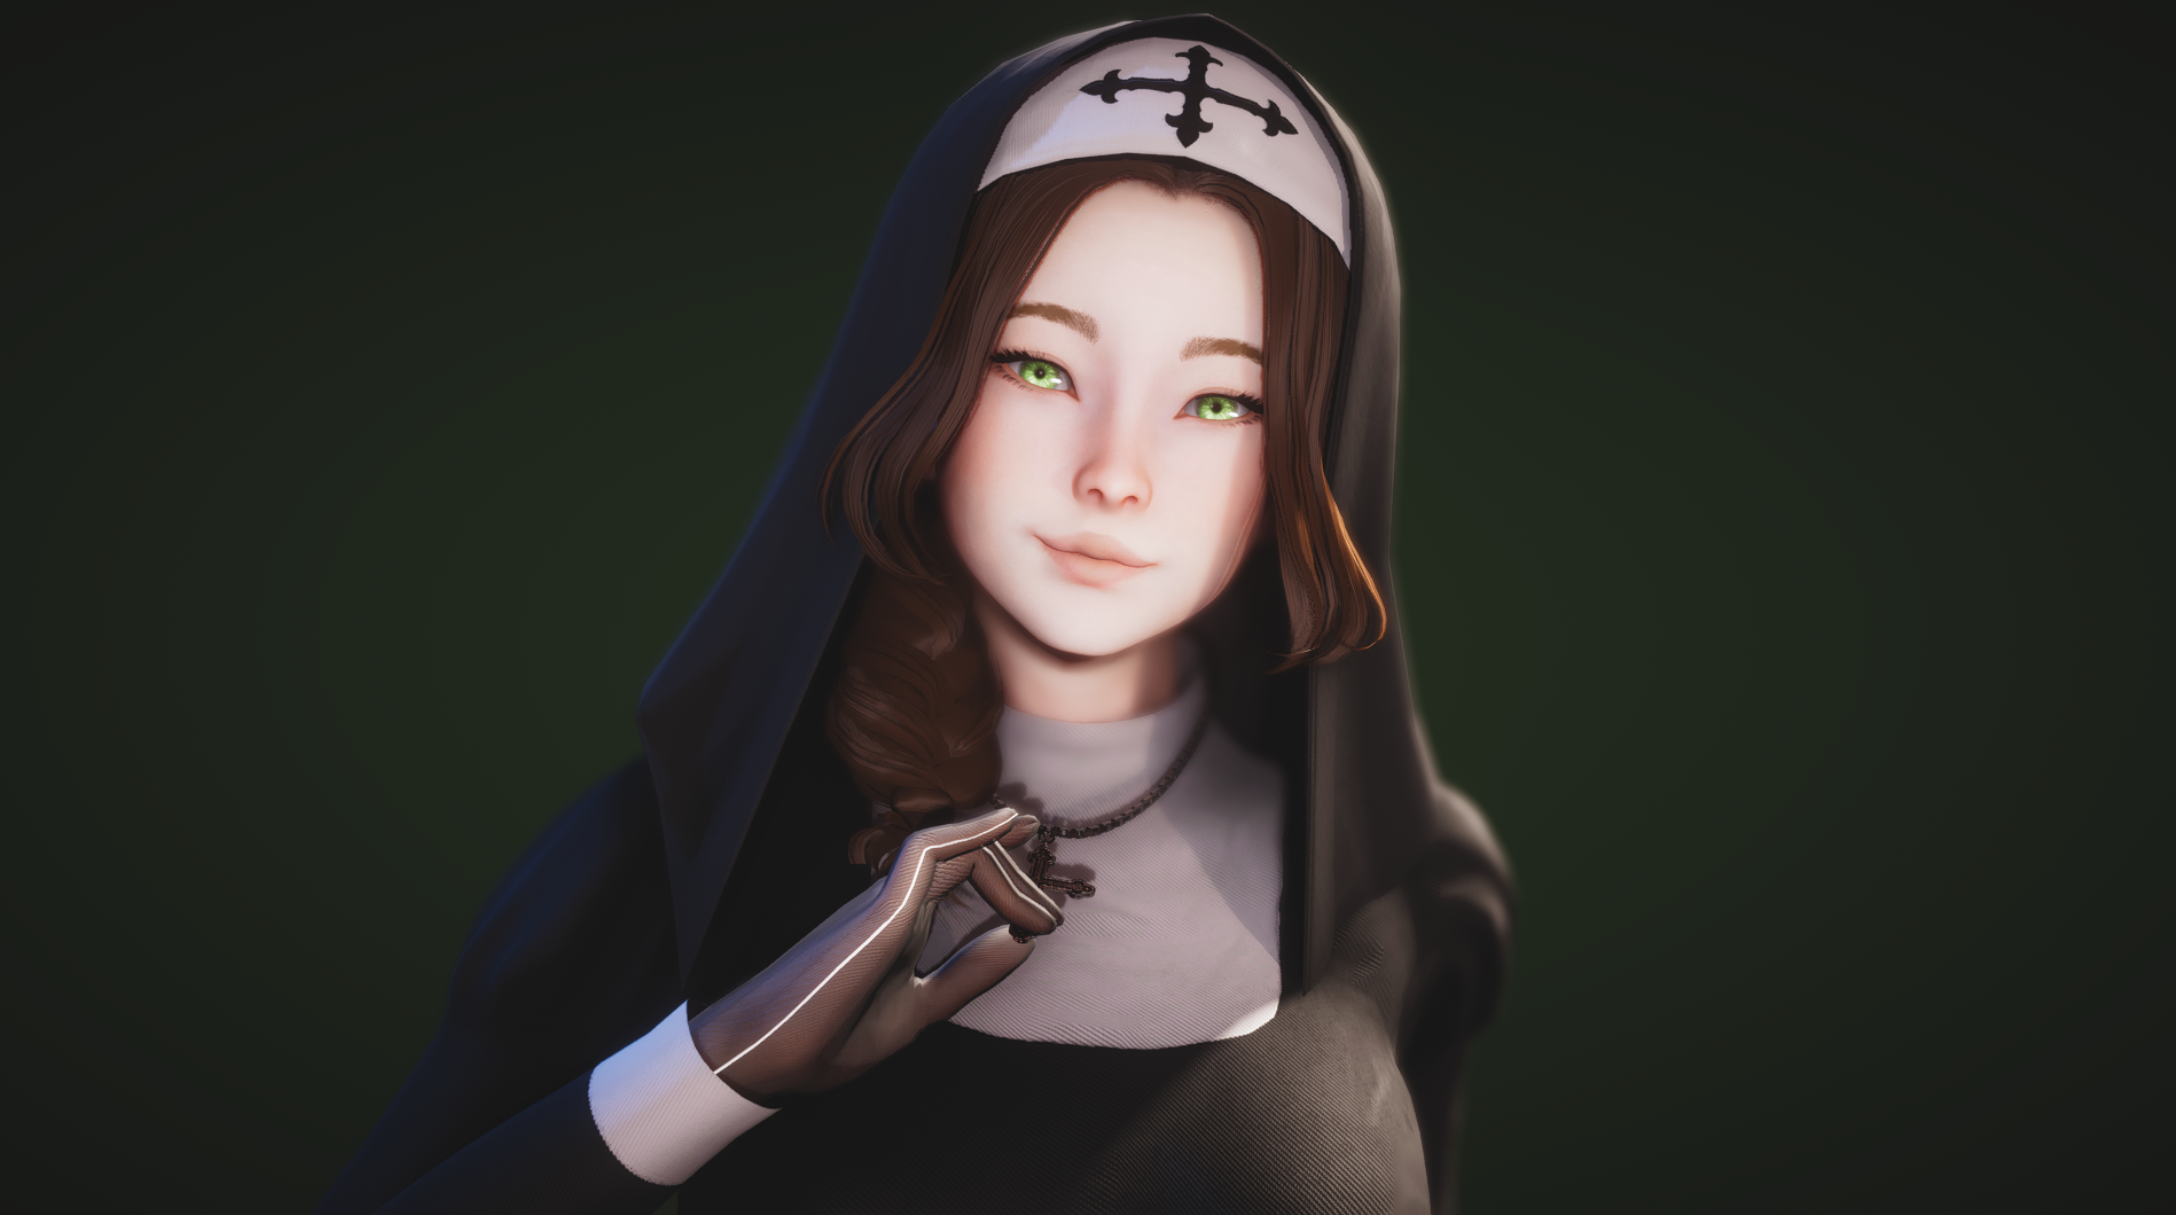
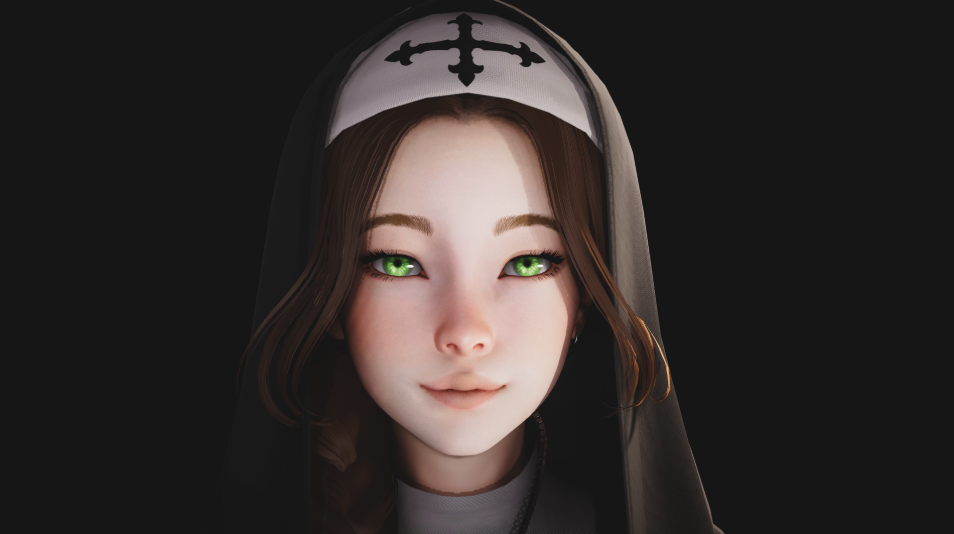
We brighten the image using more vivid lights, as well as adding a tinge of bloom to sell the “beaming smile” look. Adding depth of field further takes our eye’s attention to the nun’s face. Adding some minor changes to the corner of the mouth using HS2PE/Bone Visualizer, we slightly lift the right(our left) corner of the mouth for the finishing touch.
Ta-dah! Here’s the difference between Step 5 and Step 1. The warmth in the girl’s smile is far more prominent than the front facing initial image,
Each expression has different quirks, and has to be designed differently.
- Sad expressions can have overcast lighting, obscuring parts of the face.
- Angry expressions can be zoomed in closer to add tension.
- Laughing expressions can have crooked camera angles.
It’s useful to use your own poses and expressions as reference. Do a smile, feel the way your cheeks rise. You don’t even need a mirror to tell which part of your face does what. Exaggerate your expressions in order to decipher what you need to move and adjust.
If there’s enough interest, I might continue this document.
Thanks for reading. I hope you can make some neat expressions!